
Table of Contents
- Delicious No Bake Lactation Cookies: Your New Mom Must-Have
- How These No Bake Lactation Cookies Work
- Ingredients and Smart Substitutions
- Step-by-Step: Making Your No Bake Lactation Cookies
- Expert Tips for No Bake Lactation Cookie Success
- What to Serve With Your Lactation Cookies
- Storing and Reheating Your No Bake Lactation Cookies
- Frequently Asked Questions About No Bake Lactation Cookies
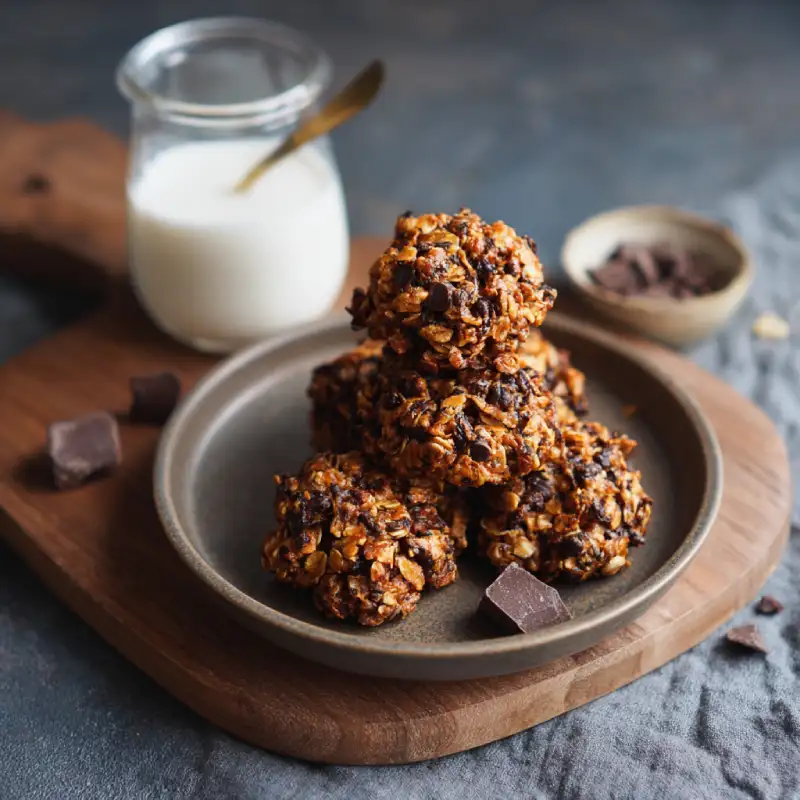
Delicious No Bake Lactation Cookies: Your New Mom Must-Have
Oh, the magic of a warm, chewy cookie! Now, imagine that cookie is not only incredibly delicious, with that perfect blend of creamy and satisfying, but also a secret weapon for new moms. That’s exactly what these no bake lactation cookies are! As a seasoned baker and a mom myself, I’ve long searched for the ultimate lactation cookie – one that didn’t require turning on the oven (because who has time for that with a newborn?) and actually tasted good. Many recipes fall flat, but after numerous trials, I’ve perfected these irresistible no bake lactation cookies. They melt in your mouth, offer a subtle sweetness, and surprisingly, don’t have that overpowering brewers yeast flavor that can plague other recipes. If you’re looking for more easy, delicious recipes for any occasion, See more good recipes here!
These aren’t just any cookies; they’re thoughtfully designed to support a mother’s milk supply during those crucial postpartum weeks and months. The carefully selected ingredients work synergistically to help boost lactation, making them a delicious and convenient way to nourish yourself while nurturing your little one. Trust me, you’ll want a batch of these on hand!
How These No Bake Lactation Cookies Work
The beauty of these no bake lactation cookies lies in their simplicity and efficacy. Each bite delivers a delightful texture – creamy enough to feel indulgent, yet firm enough to hold its shape. The sweetness comes from natural sources, making them a satisfying treat without the sugar crash. But beyond taste and texture, these cookies are powerhouses of galactagogues, which are substances known to promote lactation.
- Creamy yet firm texture: The combination of nut butter and oats creates a wonderfully satisfying mouthfeel that’s both soft and hearty.
- Naturally sweetened, satisfying taste: We rely on maple syrup or honey for a gentle sweetness that complements the nutty flavors perfectly, avoiding any artificial aftertaste.
- Packed with galactagogues: This is where the magic happens! Key ingredients like oats, flaxseed meal, and brewers yeast are specifically chosen for their milk-boosting properties.
Ingredients and Smart Substitutions
The right ingredients are key to delicious and effective no bake lactation cookies. Here’s a breakdown of what you’ll need and why each component is so important. Don’t be afraid to experiment with substitutions to suit your preferences or dietary needs.
Nut Butter (peanut butter, almond butter): The Binding Base & Healthy Fats. This is the foundation of our cookies, providing the necessary fat and protein for satiety, and acting as the primary binder. I personally love creamy peanut butter for its classic flavor, but almond butter is fantastic for a milder taste. Ensure it’s natural nut butter without added sugars or oils for the best results.
Oats (rolled oats, quick oats): The Galactagogue Powerhouse & Fiber. Oats are a classic galactagogue, widely recommended for breastfeeding mothers. They are rich in iron and fiber, which are vital for postpartum recovery and energy. Rolled oats give a chewier texture, while quick oats will make the cookies smoother. Both work beautifully, so choose what you prefer!
Flaxseed Meal: Omega-3s and Milk Supply Booster. Ground flaxseed is a star ingredient, offering plant-based omega-3 fatty acids essential for both mom and baby, and contributing to milk production. Always use ground flaxseed (meal) as whole seeds pass through the digestive system without releasing their benefits.
Brewers Yeast: Crucial Galactagogue & Nutrient Source. This is arguably the most important galactagogue in the recipe. Brewers yeast is packed with B vitamins, iron, and protein, all of which are beneficial for nursing mothers. It’s important to note that this is different from active dry yeast used for baking bread. You can find food-grade brewers yeast at health food stores or online. Don’t skip this for maximum milk-boosting power!
Sweetener (maple syrup, honey): Natural Sweetness & Energy. We use natural liquid sweeteners to bind the ingredients and provide a touch of energy. Maple syrup offers a distinct earthy sweetness, while honey brings floral notes. Both are excellent choices. Adjust the amount to your desired sweetness level.
Vanilla Extract: Flavor Enhancer. Just a splash of good quality vanilla extract elevates all the other flavors, adding a comforting warmth to your cookies.
Milk of Choice (dairy, plant-based): Adjusting Consistency. A small amount of milk helps achieve the perfect consistency for forming the cookies. Dairy milk works fine, but unsweetened almond, oat, or soy milk are excellent plant-based alternatives and won’t affect the flavor profile.
Optional Mix-ins (chocolate chips, nuts, dried fruit): Flavor & Texture. This is where you can get creative! Mini chocolate chips are always a hit. Chopped walnuts or pecans add a lovely crunch, and dried cranberries or apricots can provide a tangy counterpoint. Just be mindful not to add too much, as it can make the cookies harder to form.
Step-by-Step: Making Your No Bake Lactation Cookies
Get ready for how incredibly easy these are to whip up! No baking involved means less cleanup and more time for you and baby. Follow these simple steps for perfect no bake lactation cookies every time.
1. Prepare Your Work Surface
Line a baking sheet or a large plate with parchment paper or wax paper. This will prevent the cookies from sticking and make cleanup a breeze, especially when it’s time to chill them.
2. Combine Wet Ingredients
In a large mixing bowl, combine your chosen nut butter, maple syrup (or honey), vanilla extract, and a splash of milk. Whisk these together thoroughly until the mixture is smooth and well-incorporated. It should be easily stirrable but not runny. This forms the sticky base for your cookies.
3. Add Dry Ingredients
To the wet ingredient mixture, add the rolled oats, flaxseed meal, and brewers yeast. Make sure to sprinkle them evenly over the wet base to aid in mixing. If you’re adding any optional mix-ins like chocolate chips or nuts, this is the time to add them to the bowl as well.
4. Mix Until Well Combined
Using a sturdy spoon or your hands (which is often easiest for no-bake recipes!), mix everything together. You’ll need to work the mixture until all the dry ingredients are fully moistened by the wet ingredients. It should be thick and slightly sticky, holding together when pressed. If it’s too dry, add milk a teaspoon at a time; if too wet, add a touch more oats.
5. Form the Cookies
Scoop out portions of the mixture (about 1-2 tablespoons per cookie) and roll them into balls using your hands. Then, gently flatten them into disc shapes, about 1/2 inch thick. Place each formed cookie onto your prepared baking sheet. Aim for uniform size for consistent chilling.
6. Chill for Setting
Once all your cookies are formed, place the baking sheet in the refrigerator for at least 30 minutes, or until the cookies are firm. Chilling is crucial as it helps the cookies set, making them less sticky and easier to handle and store. Pro Tip: For an in-depth look at ingredient quality, especially for critical items like brewers yeast, I often refer to trusted sources like King Arthur Baking’s ingredient guide.
Expert Tips for No Bake Lactation Cookie Success
Even though these are “no bake,” a few expert tips can make all the difference in achieving perfect no bake lactation cookies every time. Pay attention to these nuances, and you’ll be a pro in no time!
- Don’t skip the brewers yeast: While some find the taste polarizing, it’s a powerful galactagogue. If you’re worried about the flavor, start with the recommended amount and work your way up, or try a brand known for a milder taste.
- Adjust consistency as needed: The amount of milk required can slightly vary based on your nut butter’s oil content and the humidity. If the mixture is too crumbly, add a tiny bit more milk. If it’s too sticky, add a little extra oats or flaxseed meal until it’s workable.
- Chilling is essential: This isn’t just a suggestion; it’s a must! Chilling firms up the cookies, prevents them from being a sticky mess, and melds the flavors. Don’t rush this step.
- Portion control for convenience: Use a cookie scoop or tablespoon measure to ensure your cookies are uniform in size. This makes them easier to store, stack, and also helps with tracking your intake.
- Use good quality ingredients: Since there’s no baking to transform flavors, the quality of your nut butter, maple syrup, and vanilla truly shines through. Opt for natural, high-quality ingredients.
What to Serve With Your Lactation Cookies
These no bake lactation cookies are fantastic on their own, but pairing them with the right beverage or snack can make them even more enjoyable and beneficial for a nursing mom.
- Glass of water or herbal tea: Staying hydrated is crucial for milk production, so always enjoy your cookies with a good old glass of water or a soothing herbal tea like fennel or fenugreek tea.
- With your morning coffee: A perfect little treat to accompany your morning caffeine fix. The sweetness complements the bitterness of coffee beautifully.
- As a quick snack: They’re easily portable and make for a perfect pick-me-up between feedings, offering both energy and milk-boosting benefits.
Storing and Reheating Your No Bake Lactation Cookies
Proper storage ensures your no bake lactation cookies stay fresh and delicious, ready whenever you need a boost. And while there’s no “reheating” per se, knowing how to keep them optimal is key!
- Countertop storage: You can store these cookies in an airtight container at room temperature for up to 2-3 days, especially if your home isn’t too warm. They might soften slightly but will still be perfectly good.
- Refrigeration for longer freshness: For extended freshness and a firmer texture, store the cookies in an airtight container in the refrigerator for up to 1-2 weeks. This is typically my preferred method.
- Freezing instructions: Yes, you can freeze them! Place the chilled cookies in a single layer on a baking sheet to freeze solid, then transfer them to a freezer-safe bag or container. They’ll keep for up to 3 months. Thaw them in the refrigerator overnight or at room temperature for about 30 minutes before enjoying.
Frequently Asked Questions About No Bake Lactation Cookies
Here are some common questions I get about these amazing no bake lactation cookies. Hopefully, these answers will help you feel confident in making and enjoying them! How long do these cookies last?
Stored in an airtight container, they last about 2-3 days at room temperature, 1-2 weeks in the refrigerator, and up to 3 months in the freezer. Can I make them vegan/gluten-free?
Absolutely! This recipe is naturally vegan if you use maple syrup (instead of honey) and a plant-based milk. For gluten-free, simply ensure you use certified gluten-free rolled oats and verify that your brewers yeast is also gluten-free, as some brands may have cross-contamination. When should I start eating lactation cookies?
You can start eating them anytime postpartum, especially if you feel your milk supply needs a boost, or simply as a nutritious snack. Some moms even like to have them on hand during the last weeks of pregnancy for a head start! Always consult with a lactation consultant or healthcare provider if you have significant concerns about your milk supply. What if my cookies are too sticky/crumbly?
If too sticky, try adding a tablespoon more oats or flaxseed meal until it reaches a manageable consistency. If too crumbly, add milk, half a teaspoon at a time, mixing well after each addition, until the mixture holds together when pressed. The type of nut butter and oats can affect this, so minor adjustments are common.