
Table of Contents
- Introduction: My Journey to Perfect Vegan Chocolate Milk
- How This Vegan Chocolate Milk Recipe Works
- Ingredients and Substitutions: The Why Behind Each Choice
- Step-by-Step Instructions: Your Visual Walkthrough
- Expert Tips for Success: Crucial Details for the Best Vegan Chocolate Milk
- What to Serve With Your Homemade Vegan Chocolate Milk
- Storing and Reheating Your Vegan Chocolate Milk
- Frequently Asked Questions About Vegan Chocolate Milk
Introduction: My Journey to Perfect Vegan Chocolate Milk
Oh, the humble glass of chocolate milk! For many of us, it conjures up memories of childhood snacks, cozy afternoons, or a delightful treat after a long day. But for those navigating the world of veganism, finding that perfect balance of rich, velvety chocolate and creamy texture can be a real quest. I’ve been on that journey myself, experimenting for years in my kitchen to craft a vegan chocolate milk recipe that doesn’t just substitute but truly shines. I wanted something that was intensely chocolatey, wonderfully smooth, and utterly satisfying without a single drop of dairy. And you know what? I finally cracked the code!
My inspiration came from a desire to recreate that nostalgic flavor without compromising on my plant-based values. I found that many store-bought vegan options can be either too watery, too sweet, or lack that deep, complex cocoa character. That’s why I decided to take matters into my own hands, meticulously testing different plant milks, sweeteners, and cocoa types to achieve a result that is, frankly, perfection in a glass. If you’re looking for more delicious creations like this, you can See more good recipes here! This recipe isn’t just about making chocolate milk; it’s about elevating a simple pleasure into an extraordinary experience. Get ready to have your taste buds absolutely dazzled by the best vegan chocolate milk you’ve ever had!
How This Vegan Chocolate Milk Recipe Works
This isn’t just another recipe; it’s a carefully engineered approach to achieving dairy-free chocolate milk nirvana. Here’s why this particular method stands head and shoulders above the rest:
- Naturally Creamy Without Thickeners: We leverage the natural emulsifying properties of our chosen plant milk and careful whisking to create a luxuriously smooth texture without needing any starches or gums. It’s all about technique and the right ingredients!
- Balanced Sweetness and Deep Cocoa Notes: The magic lies in the ratio of cocoa to sweetener and a tiny pinch of salt. This combination enhances the inherent bitterness and complexity of the cocoa, allowing it to truly sing without being overshadowed by excessive sugar.
- Quick Preparation for Immediate Enjoyment: While chilling is recommended for optimal flavor, this recipe is designed to be incredibly quick to prepare. You can have a warm, satisfying mug within minutes, or chill it for a refreshing cold drink. It’s perfect for those sudden chocolate cravings!
- Flavor Build-Up Through Gentle Heating: A gentle warming process allows the cocoa powder to bloom, intensifying its flavor and ensuring it fully dissolves into the milk, preventing any gritty texture. This step is crucial for that rich, uniform taste.
Ingredients and Substitutions: The Why Behind Each Choice
Here is what you need and why:
Plant-Based Milk: This is the foundation of our vegan chocolate milk, and your choice here makes a big difference. My top recommendation for ultimate creaminess and neutral flavor is oat milk, specifically a barista-style blend for its higher fat content. Almond milk is a lighter option, offering a subtle nutty undertone, but ensure it’s unsweetened to control the overall sweetness. Soy milk provides a rich mouthfeel similar to dairy milk and a good protein boost, though some find its flavor more pronounced. Avoid heavily flavored or sweetened plant milks unless you’re intentionally experimenting with those profiles.
Cocoa Powder: This is where the chocolate magic happens! For a classic, rich chocolate flavor, unsweetened natural cocoa powder, like that from King Arthur Baking, is excellent. It’s slightly acidic, which pairs beautifully with creamier plant milks. However, if you prefer a darker, less acidic, and often smoother chocolate profile (think Oreos), then Dutch-processed cocoa powder is your go-to. It undergoes an alkalizing process that mellows its acidity. I often use a mix of both for a complex, deep chocolate experience.
Sweetener: Maple syrup is my personal favorite here. It offers a wonderful depth of flavor that complements chocolate without being overly sugary, plus it dissolves beautifully. Agave nectar is another great liquid sweetener option, contributing a neutral sweetness. If you prefer a whole-food approach, soaked and pitted Medjool dates can be blended in; they add natural sweetness and a lovely caramel note, though they will require blending and potentially straining for a super smooth result.
Vanilla Extract: Don’t skip this! A good quality vanilla extract (pure, not imitation) is a secret weapon in chocolate recipes. It doesn’t make your chocolate milk taste like vanilla; instead, it amplifies the chocolate notes, layering in a subtle warmth and complexity that makes the overall flavor more robust and nuanced.
Pinch of Salt: Yes, a tiny pinch of fine sea salt is crucial! Much like in baking, salt in chocolate preparations doesn’t make things salty; it actually cuts through any potential bitterness from the cocoa and significantly brightens and enhances the chocolate’s inherent flavor. It’s the ultimate flavor booster that elevates this vegan chocolate milk from good to absolutely phenomenal.
Step-by-Step Instructions: Your Visual Walkthrough
Follow these step-by-step instructions to create your perfect vegan chocolate milk:
1. Combine the Dry Ingredients
In a medium saucepan, combine your cocoa powder, sweetener (if using a dry one like sugar, otherwise add liquid sweetener later), and that essential pinch of salt. Whisk these dry ingredients together thoroughly. This step is crucial for preventing lumps later and ensuring an even distribution of flavor. You want a uniform, fine powder mixture before introducing any liquid.
2. Gradually Whisk in Plant-Based Milk
Pour in about 1/4 cup of your chosen plant-based milk into the dry mixture. Using a whisk, stir vigorously to create a smooth, thick paste. This initial small amount of liquid helps to dissolve the cocoa completely and makes it easier to incorporate the rest of the milk without forming lumps. Once you have a smooth paste, gradually add the remaining plant milk, whisking continuously until fully combined and smooth.
3. Gently Heat for Optimal Flavor
Place the saucepan over medium-low heat. Stir or whisk gently but continuously as the mixture warms. You’re not looking to boil it, just to bring it to a gentle warmth. This process allows the cocoa powder to ‘bloom,’ releasing its full aroma and deepening the chocolate flavor. It also ensures all ingredients are perfectly dissolved for that silky-smooth texture. Remove from heat just as steam begins to rise and small bubbles form around the edges.
4. Add Vanilla and Chill (Optional, but Recommended)
Remove the saucepan from the heat and stir in the vanilla extract. Give it a final good whisk. At this point, your vegan chocolate milk is ready to enjoy warm! However, for the absolute best flavor and texture, I highly recommend chilling it in the refrigerator for at least 2 hours, or even overnight. This allows the flavors to fully meld and deepen, resulting in an incredibly rich and refreshing cold drink. Simply pour it into an airtight container or pitcher and refrigerate.
Expert Tips for Success: Crucial Details for the Best Vegan Chocolate Milk
- Sifting Cocoa Powder: This is a non-negotiable step for a truly smooth drink. Cocoa powder tends to clump, and sifting it before combining with other dry ingredients or a small amount of liquid will guarantee a lump-free chocolate milk every time.
- Taste as You Go: Sweetness and chocolate intensity are deeply personal. After gently heating, taste your chocolate milk. Is it sweet enough? Do you want more chocolate punch? Adjust by adding a tiny bit more sweetener or a pinch more cocoa (whisk vigorously to dissolve), then re-warm gently if adding cocoa.
- Using a Whisk: A good sturdy whisk is your best friend here. It’s essential for breaking down any cocoa clumps, thoroughly combining ingredients, and creating that lovely emulsified, smooth consistency, especially during the initial paste-making and heating stages.
- Quality Ingredients Matter: Just like with any recipe, the quality of your ingredients directly impacts the final taste. Invest in a good quality cocoa powder and a plant-based milk you genuinely enjoy the flavor of. It makes all the difference in your delicious vegan chocolate milk.
- Don’t Overheat: While gentle warming is key, avoid boiling your plant milk. High heat can sometimes alter the flavor or cause certain plant milks to separate or develop a skin. Keep the heat low to medium-low and remove it as soon as it’s warm.
What to Serve With Your Homemade Vegan Chocolate Milk
Your deliciously rich vegan chocolate milk is a star on its own, but it also plays incredibly well with others. Here are some fantastic ways to enjoy it:
- Freshly Baked Vegan Cookies or Brownies: There’s nothing quite like dipping a soft, chewy vegan chocolate chip cookie or a fudgy vegan brownie into a cold glass of homemade chocolate milk. It’s the ultimate comforting treat combination!
- As a Base for Smoothies or Milkshakes: Elevate your breakfast smoothie or turn it into an indulgent milkshake. Blend it with a frozen banana, a scoop of peanut butter, and a few ice cubes for an epic chocolate-peanut butter shake.
- Over Ice with a Sprinkle of Cinnamon: For a simple yet sophisticated twist, serve your chilled chocolate milk over ice and dust with a tiny sprinkle of Ceylon cinnamon. The cinnamon adds a lovely warmth and aromatic depth that beautifully complements the chocolate.
- With Vegan Pancakes or Waffles: Pair a hot stack of fluffy vegan pancakes or crisp waffles with a refreshing glass of chocolate milk for a delightful brunch.
- Alongside Savory Snacks: Believe it or not, the richness of chocolate milk can be a fantastic counterbalance to slightly salty or savory snacks like pretzels or a light vegan sandwich.
Storing and Reheating Your Vegan Chocolate Milk
You’ve put in the effort to make this incredible vegan chocolate milk, so let’s make sure you know how to keep it fresh and enjoy it for days!
Refrigeration: Once prepared and cooled, transfer your chocolate milk to an airtight container or a pitcher with a lid. Store it in the refrigerator for up to 3-4 days. While it might naturally separate a little (especially if using some plant milks), a quick whisk or shake before serving will bring it right back to its creamy consistency. This also allows the flavors to truly meld, often making it taste even better on day two!
Reheating: If you prefer your chocolate milk warm, you can gently reheat portions. The best method is to pour your desired amount into a small saucepan and warm it over low heat, stirring frequently, until it reaches your preferred temperature. Avoid boiling. Alternatively, you can microwave it in 30-second intervals, stirring in between, until warm. If you used dates as a sweetener, the texture might change slightly upon reheating, so keep an eye on it.
Freezing: While technically possible, I don’t generally recommend freezing finished vegan chocolate milk if you intend to drink it. The texture of plant-based milks can sometimes become grainy or separate upon thawing, especially if they have a lower fat content. However, it can be frozen into ice cube trays and then used in smoothies or blended into a frosty drink. Perfect for future milkshake experiments!
Frequently Asked Questions About Vegan Chocolate Milk
Can I use chocolate syrup instead of cocoa powder?
How can I make it thicker?
Is this suitable for children?
Can I make a large batch ahead of time?
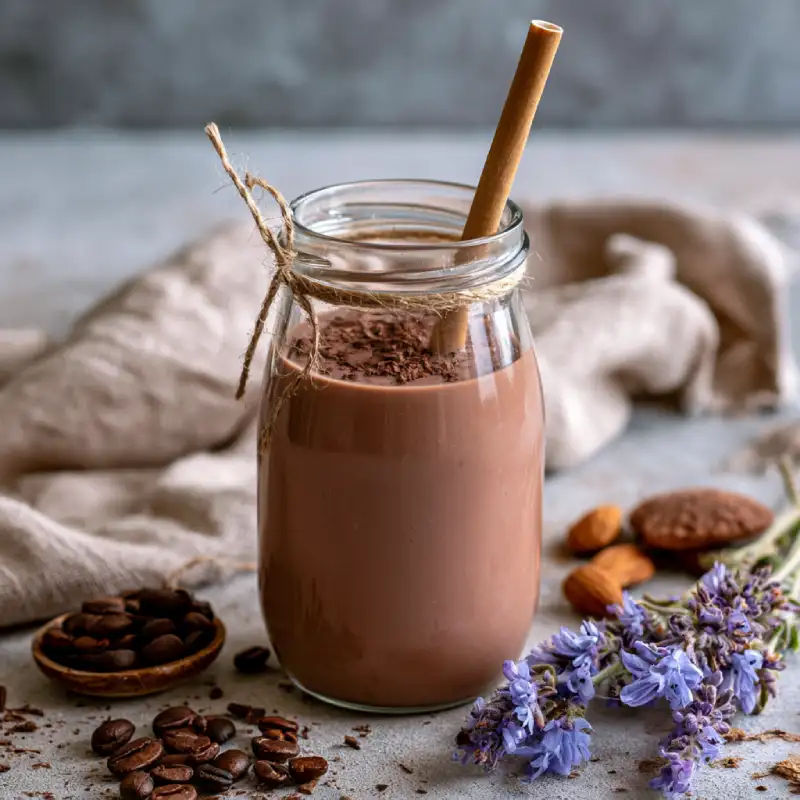
Creamy Vegan Chocolate Milk
- Total Time: 10 minutes
- Yield: 2 servings (approx. 2 cups)
Description
Unlock the secret to rich, velvety vegan chocolate milk that rivals any dairy version. This easy recipe delivers deep cocoa flavor and a perfectly smooth texture, ready to enjoy in minutes.
Ingredients
- 2 cups (480ml) unsweetened plant-based milk (oat or soy recommended)
- 2–3 tablespoons unsweetened cocoa powder (natural or Dutch-processed, or a mix)
- 2–4 tablespoons maple syrup (or agave, adjust to taste)
- 1/2 teaspoon pure vanilla extract
- Pinch of fine sea salt
Instructions
- 1. Combine Dry Ingredients: In a medium saucepan, whisk together the cocoa powder, maple syrup (if using a dry sweetener like sugar, otherwise add liquid later), and salt until thoroughly combined and lump-free.
- 2. Create a Paste: Pour in about 1/4 cup of the plant-based milk and whisk vigorously until a smooth, thick paste forms.
- 3. Add Remaining Milk: Gradually add the remaining plant-based milk, whisking continuously until fully incorporated and smooth.
- 4. Gently Heat: Place the saucepan over medium-low heat. Stir gently but continuously until the mixture is warm, just as steam begins to rise and small bubbles form around the edges. Do not boil.
- 5. Finish and Serve: Remove from heat and stir in the vanilla extract. Serve warm immediately, or transfer to an airtight container and refrigerate for at least 2 hours (or overnight) for best cold flavor. Whisk or shake before serving chilled.
- Prep Time: 5 minutes
- Cook Time: 5 minutes