
Table of Contents
- Our Favorite Weeknight Meal: Chicken Rice in a Rice Cooker
- Why This One-Pot Chicken Rice Recipe Works Every Time
- Essential Ingredients & Smart Substitutions
- Step-by-Step: Making Chicken Rice in Your Rice Cooker
- Expert Tips for the Best Chicken Rice
- What to Serve With Your Chicken Rice
- Storing and Reheating Leftovers
- Frequently Asked Questions About Chicken Rice
Our Favorite Weeknight Meal: Chicken Rice in a Rice Cooker
Imagine this: succulent, tender chicken infused with aromatics, perfectly cooked jasmine rice, all melded together in one glorious dish. That, my friends, is the magic of homemade chicken rice recipe rice cooker style! It’s a complete meal, bursting with savory flavor, and the best part? It largely cooks itself. This isn’t just a recipe; it’s a weeknight lifesaver, a comforting hug in a bowl, and quite possibly, the most satisfying thing you’ll make in your rice cooker. If you’re looking for incredibly flavorful and easy dinner ideas, you’ve come to the right place. And while you’re here, why not See more easy recipes to expand your culinary repertoire?
Why This Recipe Works for Busy Home Cooks
Life can be hectic, and the last thing you want after a long day is a complicated recipe with a mountain of dishes. This chicken rice recipe in a rice cooker is designed for exactly that – busy schedules. It’s mostly hands-off, allowing you to tackle other tasks or simply relax while your rice cooker does the heavy lifting. Preparation is quick, and cleanup is minimal, making it a dream come true for anyone short on time but unwilling to compromise on taste.
My Personal Connection to This Dish
Chicken rice holds a special place in my heart. Growing up, the aroma of ginger, garlic, and simmering chicken broth would instantly transport me to my grandmother’s kitchen. While she often made hers the traditional stovetop way, I’ve adapted her foundational flavors into this incredibly convenient rice cooker version. It’s a taste of home, simplified for the modern kitchen, and every bite brings back those cherished memories. It’s a testament to how traditional flavors can be beautifully reinterpreted for ease and efficiency.
Why This One-Pot Chicken Rice Recipe Works Every Time
- Perfectly Cooked Rice, Every Time: A rice cooker is an expert at cooking rice. It maintains a consistent temperature and ensures your jasmine grains are fluffy, separate, and cooked just right, absorbing all the delicious chicken juices.
- Flavorful, Tender Chicken: By cooking the chicken directly with the rice, the chicken infuses its delectable flavors into every single grain, resulting in an incredibly aromatic and moist dish. No dry chicken here!
- Minimal Cleanup: Seriously, this is a one-pot wonder. Everything cooks together, meaning less scrubbing and more time enjoying your fantastic meal.
- Foolproof Method: Even if you’re a novice cook, a rice cooker makes this preparation nearly impossible to mess up. Just layer, press start, and wait for deliciousness.
Essential Ingredients & Smart Substitutions
Here is what you need and why:
Chicken: Thighs vs. Breast and Why: For this chicken rice recipe rice cooker method, I highly recommend using bone-in, skin-on chicken thighs. The fat from the skin and connective tissue from the bone renders down, adding incredible moisture and depth of flavor to both the chicken and the rice. If you prefer white meat, boneless, skinless chicken breasts can work, but consider brining them briefly or marinating them to prevent dryness. You might also want to add an extra tablespoon of oil or a pat of butter to the rice cooker for added richness.
Rice: Jasmine is Key, but Others Work: Jasmine rice is the star here. Its fragrant, slightly sticky, and delicate texture is absolutely perfect for absorbing the savory liquids. However, if you don’t have jasmine, long-grain white rice or basmati will also work, though they might yield a slightly different texture. Avoid quick-cooking or instant rice for this recipe, as the cooking times and liquid ratios will be off.
Ginger & Garlic: Freshness Matters: These two are non-negotiable flavor powerhouses. Freshly grated ginger and minced garlic provide an aromatic foundation that is simply unbeatable. While garlic powder and ground ginger can be used in a pinch, they won’t deliver the same vibrant, pungent punch. Go for fresh; your taste buds will thank you!
Soy Sauce & Sesame Oil: Flavor Foundation: These Asian pantry staples are crucial for the umami and nutty notes that define this dish. Use a good quality light (or regular) soy sauce, and a toasted sesame oil for that distinct, deeply aromatic finish. For a gluten-free option, use tamari instead of soy sauce.
Chicken Broth: Elevating the Taste: While water can work, using low-sodium chicken broth instead of plain water significantly enhances the overall flavor profile of your chicken rice recipe rice cooker creation. It adds another layer of savory richness to every grain of rice. If you only have high-sodium broth, dilute it slightly or reduce the soy sauce to balance the saltiness.
Optional Add-ins: Mushrooms/Carrots: Want to boost the nutrition and texture? Sliced mushrooms (shiitake or cremini) or finely diced carrots make excellent additions. Add them in with the chicken before cooking for extra flavor and color. They absorb the cooking liquid beautifully and become wonderfully tender.
Step-by-Step: Making Chicken Rice in Your Rice Cooker
Follow these step-by-step photos:
1. Prepping the Chicken
Pat your chicken thighs dry with paper towels. This helps ensure a nicer sear if you choose to pre-brown them (see expert tips!). Season generously with a pinch of salt and black pepper. If using, a quick marinade of a teaspoon of soy sauce and a dash of white pepper for 10-15 minutes can also enhance flavor and tenderness, especially for chicken breast.
2. Washing and Soaking the Rice
Place your jasmine rice in a fine-mesh sieve and rinse under cold running water until the water runs clear. This removes excess starch, preventing sticky or gummy rice. For an even fluffier texture, you can soak the rinsed rice in a bowl of clean water for 20-30 minutes, then drain thoroughly before adding to the rice cooker.
3. Layering Ingredients in the Rice Cooker
Pour the rinsed (and optional soaked) rice into your rice cooker pot. Add the chicken broth, soy sauce, and sesame oil. Stir lightly to combine. Nestle the seasoned chicken thighs on top of the rice mixture, skin-side up if you browned them. Scatter the minced garlic and grated ginger around and on top of the chicken. If using optional vegetables like mushrooms or carrots, add them now.
4. Cooking Cycle & Resting Period
Close the rice cooker lid and select the ‘White Rice’ or ‘Standard Cook’ setting. Let the rice cooker do its magic. Once the cycle finishes, and it switches to ‘Keep Warm’, do NOT open the lid immediately! This is crucial. Allow the chicken rice to rest for at least 10-15 minutes. This resting period allows the steam to redistribute, resulting in more evenly cooked rice and incredibly juicy chicken.
5. Fluffing and Serving
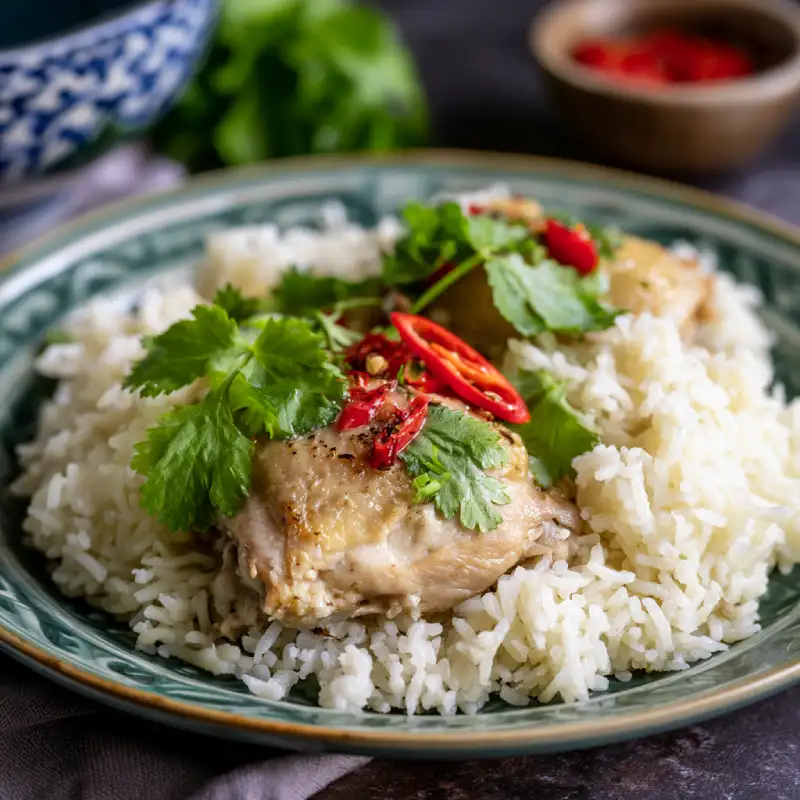
After the resting period, open the lid. Carefully remove the chicken to a cutting board. Use a rice paddle or fork to gently fluff the rice, incorporating all the savory bits and aromatics. Shred or slice the chicken into bite-sized pieces. Serve the fluffy, flavorful rice with the chicken on top, garnished with fresh cilantro or chopped green onions, if desired. A squeeze of lime can brighten everything up!
Expert Tips for the Best Chicken Rice
- Don’t Skip the Chicken Skin Browning (if applicable): If your rice cooker has a sauté function or you’re willing to use a separate pan, briefly searing the chicken thighs skin-side down before adding them to the rice cooker renders some fat and creates a deliciously crispy skin. You can then add the seared chicken directly to the pot with the rendered fat for even more flavor!
- Adjusting Liquid for Different Rice Cookers: Rice cooker models vary. Some require slightly more or less liquid than others. As a general rule, for every 1 cup of jasmine rice, use 1.25 cups of liquid (broth + soy sauce). If you usually adjust water for your specific rice cooker, apply that same adjustment here.
- The Importance of Resting Time: Seriously, don’t rush this! The 10-15 minute resting period after cooking is vital. It allows the rice grains to absorb residual steam and firm up, preventing them from being mushy, and ensures the chicken finishes cooking to perfection, staying wonderfully moist.
- Achieving Crispy Bottoms (if desired): Some traditional chicken rice methods aim for a slightly crispy layer of rice at the bottom. If your rice cooker has a ‘claypot’ or ‘crispy rice’ setting, you can experiment with that. Otherwise, slightly reducing the liquid by about 1/4 cup might help, but watch carefully to prevent burning.
- Harnessing Umami with Shiitake: For an extra layer of umami, consider rehydrating a few dried shiitake mushrooms and slicing them thinly. Add the rehydrated mushrooms and a tablespoon or two of the soaking liquid to the rice cooker along with the other liquids. Food Network has a great guide on rehydrating dried mushrooms.
What to Serve With Your Chicken Rice
This chicken rice recipe rice cooker dish is a complete meal on its own, but a few simple sides can elevate it to a feast!
- Simple Cucumber Salad: Thinly sliced cucumbers dressed with a splash of rice vinegar, a pinch of sugar, and a dash of sesame oil offer a refreshing, tangy counterpoint to the savory chicken rice.
- Chili Garlic Sauce: For those who love a kick, a dollop of chili garlic sauce or sriracha on the side is a must. You can also make your own by blending fresh red chilies, garlic, a touch of vinegar, and sugar.
- Steamed Greens: A side of blanched or steamed bok choy, gai lan (Chinese broccoli), or even simple spinach, lightly drizzled with oyster sauce or a little more sesame oil, adds a healthy, vibrant element.
Storing and Reheating Leftovers
One of the best things about this chicken rice recipe rice cooker creation is how well it keeps!
- Fridge Storage Guidelines: Store cooled chicken rice in an airtight container in the refrigerator for up to 3-4 days. Ensure it cools down quickly before refrigerating to maintain freshness.
- Freezing for Meal Prep: This dish freezes beautifully. Once completely cooled, portion the chicken rice into individual freezer-safe containers. It can be frozen for up to 2-3 months. Thaw overnight in the refrigerator before reheating.
- Best Reheating Methods: For best results, reheat in the microwave with a sprinkle of water or a damp paper towel over the top to prevent drying out. You can also reheat gently in a pot on the stovetop over low heat, adding a splash of broth if it seems too dry.
Frequently Asked Questions About Chicken Rice
Can I use brown rice?
How do I prevent chicken from drying out?
What if my rice cooker doesn’t have a ‘chicken rice’ setting?
Is this recipe gluten-free?
Delicious Chicken Rice in a Rice Cooker
- Total Time: 1 hour
- Yield: 4 servings
Description
Unlock the secret to incredibly flavorful and moist chicken rice with minimal effort using your rice cooker. This one-pot meal features tender chicken, aromatic ginger and garlic, and perfectly cooked jasmine rice bursting with savory notes.
Ingredients
- 2 cups Jasmine rice, rinsed
- 2 bone-in, skin-on chicken thighs (about 1 lb total)
- 2 cups low-sodium chicken broth
- 2 tablespoons soy sauce (or tamari for GF)
- 1 teaspoon toasted sesame oil
- 1 inch fresh ginger, grated or finely minced
- 3 cloves garlic, minced
- Salt and black pepper to taste
- Optional: 1/2 cup sliced mushrooms or diced carrots
- Optional Garnish: Fresh cilantro or chopped green onions
Instructions
- 1. Prepare Chicken: Pat chicken thighs dry and season lightly with salt and pepper. Optionally, brown skin-side down in a hot pan for 3-4 minutes before adding to rice cooker.
- 2. Rinse Rice: Rinse jasmine rice under cold water until water runs clear. Drain well.
- 3. Combine in Rice Cooker: Add rinsed rice to the rice cooker pot. Pour in chicken broth, soy sauce, and sesame oil. Stir gently.
- 4. Add Aromatics & Chicken: Place seasoned chicken thighs on top of the rice. Scatter minced garlic and grated ginger around the chicken. Add optional vegetables if using.
- 5. Cook & Rest: Close the lid and select the ‘White Rice’ or ‘Standard Cook’ setting. Once finished, allow the chicken rice to rest for 10-15 minutes on ‘Keep Warm’ without opening the lid.
- 6. Fluff & Serve: Carefully remove chicken from the pot. Fluff the rice with a paddle. Shred or slice chicken and serve over the fluffy rice, garnished with fresh cilantro or green onions.
- Prep Time: 15 mins
- Cook Time: 45 mins (includes resting)