
Table of Contents
- Introduction: Your Go-To Dairy-Free Crackers
- How This Recipe Works: Achieving Perfect Dairy-Free Crackers
- Ingredients and Smart Substitutions for Dairy-Free Crackers
- Step-by-Step Instructions: Baking Your Dairy-Free Crackers
- Expert Tips for Dairy-Free Cracker Success
- What to Serve With Your Dairy-Free Crackers
- Storing and Reheating Dairy-Free Crackers
- Frequently Asked Questions About Dairy-Free Crackers
Introduction: Your Go-To Dairy-Free Crackers
Imagine a cracker that’s impossibly crisp, satisfyingly savory, and completely dairy-free. Not a flimsy, flavorless stand-in, but a cracker so delicious, it stands on its own and elevates every dip, spread, or cheese alternative you pair it with. That’s precisely what I set out to create, and after countless experiments, I’m thrilled to share my definitive recipe for the best dairy free crackers you’ll ever bake! These aren’t just for those with dietary restrictions; they are for anyone who appreciates real flavor and an incredible crunch. If you’re looking to broaden your culinary horizons and discover more delightful recipes, See more easy recipes and get inspired!
Why I Developed This Recipe
As a passionate home baker with a keen interest in accommodating various dietary needs without sacrificing taste, I noticed a distinct gap in the market for truly stellar dairy-free crackers. Many store-bought options often lack depth of flavor or a truly satisfying texture. I wanted a cracker that tasted homemade, offered a beautiful crispness, and was simple enough for anyone to make. This recipe is a culmination of that quest, born from a desire to make delicious, inclusive baking accessible to all.
What Makes These Crackers Special (and dairy-free)
The magic of these dairy free crackers lies in their simplicity and the thoughtful selection of ingredients. We harness the power of readily available pantry staples to create a cracker that’s both robust and delicate, avoiding dairy entirely without compromising on texture or taste. The careful balance of fat and liquid, combined with a precise baking method, ensures a cracker that’s crispy, not brittle, with a nuanced savory flavor that will have everyone asking for your secret.
How This Recipe Works: Achieving Perfect Dairy-Free Crackers
- Crispy, Not Brittle Texture: The secret to their incredible snap is a super-thin roll and the right amount of oil, creating a tender crumb that crisps up beautifully without turning hard or crumbly.
- Savory and Versatile Flavor Profile: We use just enough salt and a touch of something extra (which you can customize!) to make these crackers flavorful on their own, yet versatile enough to pair with anything.
- Simple Ingredients, Big Impact: You won’t find any exotic or hard-to-find ingredients here. This recipe proves that even the simplest elements, when combined correctly, can yield extraordinary results.
- One-Bowl Cleanup: Almost all the mixing happens in a single bowl, making cleanup a breeze and putting homemade crackers within reach even on busy days.
Ingredients and Smart Substitutions for Dairy-Free Crackers
Here is what you need and why:
All-Purpose Flour: This is the backbone of our crackers, providing structure and chew. I prefer unbleached all-purpose flour for a cleaner flavor. For those seeking alternatives, you can successfully substitute a 1:1 gluten-free all-purpose flour blend (one specifically designed for baking, often containing xanthan gum) to make these gluten-free. Just be aware the texture might be slightly different.
Dairy-Free Fat (Olive Oil or Melted Coconut Oil): This is paramount for achieving that tender, crisp texture without any dairy. Olive oil lends a lovely subtle flavor, while melted refined coconut oil is neutral. Avoid unrefined coconut oil unless you want a distinct coconut taste. This fat also helps carry the flavor throughout the cracker.
Fine Sea Salt: Crucial for seasoning. Don’t skimp! Salt enhances all the other flavors. I recommend fine sea salt for even distribution and a clean taste. You can also sprinkle a little flaky sea salt on top before baking for a gourmet touch and extra crunch.
Cold Water: Water is key to hydrating the flour and bringing the dough together. Using cold water helps prevent the dough from getting too sticky and also contributes to a more tender cracker by limiting gluten development slightly.
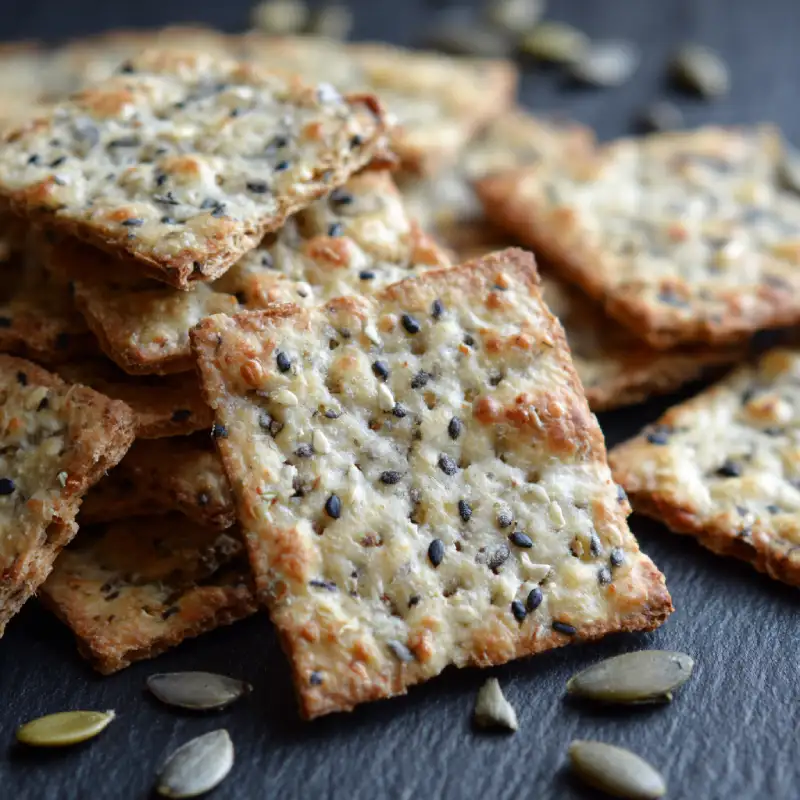
Optional Add-ins (Herbs, Seeds, Spices): This is where you can truly make these crackers your own! Think dried rosemary, thyme, onion powder, garlic powder, black pepper, sesame seeds, poppy seeds, or even a dash of nutritional yeast for a cheesy flavor. Start with a teaspoon or two and adjust to your preference. King Arthur Baking has some great ideas for flavor variations!
Step-by-Step Instructions: Baking Your Dairy-Free Crackers
Follow these step-by-step instructions to bake perfect dairy-free crackers:
1. Prepare the Dough: Mixing and Kneading
In a large bowl, whisk together the all-purpose flour and fine sea salt (and any dry optional add-ins). Create a well in the center and pour in your chosen dairy-free fat (olive oil or melted coconut oil) and cold water. Mix with a sturdy spoon or your hands until a shaggy dough forms. Turn the dough out onto a lightly floured surface and knead gently for just 1-2 minutes, until it comes together into a smooth ball. Do not over-knead; excessive kneading can make your crackers tough.
2. Rolling Thin: Achieving Uniformity
Divide the dough into two equal portions. On a lightly floured surface, take one portion and roll it out with a rolling pin. The goal is to roll it as thin as humanly possible, ideally to about 1/16th of an inch. Think about the thickness of a piece of cardstock. The thinner you roll, the crispier your dairy free crackers will be! If the dough resists, let it rest for 5 minutes, then continue rolling. You want an even thickness across the entire sheet to ensure uniform baking.
3. Scoring and Shaping: Before Baking
Carefully transfer the rolled-out dough to a baking sheet lined with parchment paper. Using a pizza cutter, a sharp knife, or even a pastry wheel, score the dough into your desired cracker shapes (squares, rectangles, triangles). Do not cut all the way through, just score it so they easily break apart after baking. You can also use cookie cutters for fun shapes, but remember to re-roll the scraps. Now, take a fork and gently prick holes over the entire surface of the dough. This prevents them from puffing up like pita bread while baking, ensuring that desired flat, crispy cracker.
4. Baking for Crispiness: Temperature and Time
Preheat your oven to 375°F (190°C). Bake the scored and pricked dough for 12-18 minutes. Baking time will vary significantly depending on your oven and how thin you rolled the dough. Keep a very close eye on them, especially after the 10-minute mark. You’re looking for a beautiful golden-brown color around the edges and a slightly lighter golden shade in the center. If some crackers brown faster than others, you can remove them and let the rest continue baking. Transfer the baked crackers to a wire rack right away to cool completely, then break them apart along the scored lines.
Expert Tips for Dairy-Free Cracker Success
- Don’t Over-Knead: A short knead (1-2 minutes) is all you need to bring the dough together. Over-kneading develops too much gluten, which can lead to tough, rather than tender, crackers.
- Roll Evenly for Consistent Baking: This is perhaps the most crucial tip. If your dough is thick in some areas and thin in others, you’ll end up with burned edges and raw centers. Invest time in achieving a uniform, paper-thin sheet.
- Prick Holes to Prevent Puffing: Those little fork holes serve an important purpose by allowing steam to escape. Without them, your crackers will balloon up, losing their signature flat, crisp texture.
- Watch for Browning: They Bake Fast: Crackers go from perfectly golden to burnt in a matter of seconds. Stay near the oven during the last few minutes of baking and trust your eyes more than the clock.
- Season Liberally: Crackers need bold seasoning! Don’t be shy with the salt, and experiment with herbs or spices on their own or mixed into the dough.
What to Serve With Your Dairy-Free Crackers
Pairing with Dairy-Free Dips and Spreads
These versatile dairy free crackers are the perfect canvas for an array of vibrant dairy-free dips. Think creamy homemade hummus, smoky baba ghanoush, or a zesty avocado dip. For something fresh, try a vibrant salsa or a chunky cucumber and dill dip made with dairy-free sour cream. The crispness of the crackers provides a wonderful contrast to smooth, rich textures.
Accompaniments for Soups and Salads
Forget croutons! Crumble these fresh dairy free crackers over your favorite bowl of soup (tomato, lentil, or vegetable bisque are personal favorites) for an extra layer of crunch and savory goodness. They also make a fantastic, light accompaniment to a fresh green salad, adding texture without being overly heavy.
Cheese Alternatives and Appetizer Ideas
Hosting a gathering? These crackers shine on an appetizer platter featuring various dairy-free cheese alternatives – from cashew-based to almond-based cheeses. Pair them with olive tapenade, roasted red pepper spreads, marinated artichoke hearts, or a selection of fresh fruit like grapes and apple slices for a balanced and enticing spread.
Storing and Reheating Dairy-Free Crackers
Keeping Them Crispy: Air-Tight Storage
Once completely cooled, store your homemade dairy free crackers in an airtight container at room temperature. A cookie tin or a sturdy plastic container works perfectly. The key is to keep out any moisture, which is the enemy of crispness. Stored properly, they will retain their crisp texture for up to two weeks (though I doubt they’ll last that long!).
Refreshing Stale Crackers (If Needed)
If, by some chance, your crackers lose a bit of their crunch over time, don’t despair! You can easily revive them. Simply spread them in a single layer on a baking sheet and pop them into a preheated oven at 300°F (150°C) for 5-7 minutes. Let them cool completely on a wire rack before serving. This brief toast will often bring back their delightful crispness!
Frequently Asked Questions About Dairy-Free Crackers
Can I Make These Gluten-Free?
Can I Add Seeds or Herbs?
How Long Do They Last?
Crispy Homemade Dairy-Free Crackers
- Total Time: 30 minutes
- Yield: Approx. 40-50 crackers
Description
Discover how to make incredibly delicious and perfectly crisp dairy-free crackers with this simple, step-by-step guide. They are easy to bake and promise the best savory flavor and satisfying crunch.
Ingredients
- 1 ½ cups (180g) all-purpose flour (or 1:1 gluten-free blend)
- 1 teaspoon fine sea salt, plus more for sprinkling
- ¼ cup (60ml) olive oil or melted refined coconut oil
- ½ cup (120ml) very cold water
- Optional: 1-2 teaspoons dried herbs (rosemary, thyme, oregano), 1-2 tablespoons seeds (sesame, poppy)
Instructions
- 1. Mix the Dough: In a large bowl, whisk together flour, salt, and any dry optional add-ins. Add oil and cold water; mix until a shaggy dough forms. Knead gently on a lightly floured surface for 1-2 minutes until smooth.
- 2. Roll Thin: Divide dough in half. Roll each half as thin as possible (about 1/16th inch) on a lightly floured surface. The thinner, the crispier.
- 3. Score and Prick: Transfer rolled dough to a parchment-lined baking sheet. Score into desired shapes (squares, rectangles) with a pizza cutter, but don’t cut through completely. Prick holes all over the dough with a fork to prevent puffing.
- 4. Bake: Preheat oven to 375°F (190°C). Bake for 12-18 minutes, watching closely. Crackers are done when golden brown and crisp.
- 5. Cool and Serve: Immediately transfer baked crackers to a wire rack to cool completely. Break apart along score lines and enjoy!
- Prep Time: 15 mins
- Cook Time: 15 mins