
Table of Contents
- Crafting Perfect Gluten-Free Manicotti Shells from Scratch
- How These Gluten-Free Manicotti Shells Deliver on Taste & Texture
- Essential Ingredients & Smart Substitutions for Gluten-Free Manicotti Shells
- Step-by-Step: Making Your Gluten-Free Manicotti Shells
- Expert Tips for Flawless Gluten-Free Manicotti Shells
- Serving Suggestions: What to Pair with Your Homemade Manicotti
- Storing and Reheating Your Gluten-Free Manicotti Shells
- Frequently Asked Questions About Gluten-Free Manicotti Shells
Crafting Perfect Gluten-Free Manicotti Shells from Scratch
Are you tired of searching for decent gluten free manicotti shells that don’t crumble, tear, or leave you with a gritty aftertaste? Me too! That’s precisely why I embarked on a mission to develop a recipe that not only works but actually excels. This isn’t just about swapping out wheat flour; it’s about understanding the unique properties of gluten-free ingredients to create a pasta that is pliable, flavorful, and incredibly satisfying. Get ready to impress your family and friends with homemade manicotti that everyone can enjoy!
For more culinary adventures, be sure to check out more good recipes here.
Why I Developed This Recipe for Hearty Gluten-Free Manicotti
The market for gluten-free pasta has definitely improved, but finding pre-made gluten-free manicotti shells that truly hold up to robust fillings and baking without disintegrating has been a consistent challenge. As a passionate home baker and avid Italian food lover, I wanted to recreate that authentic, comforting experience of a perfectly stuffed and sauced manicotti, but without the gluten. This recipe is the culmination of countless tests and tweaks, designed to give you a genuinely hearty, delicious, and structurally sound gluten-free option.
How These Gluten-Free Manicotti Shells Deliver on Taste & Texture
Preparing gluten free manicotti shells at home might seem daunting, but once you master this recipe, you’ll wonder why you ever settled for less. These shells are specifically engineered to tackle all the common gluten-free pasta pitfalls.
Achieves a Pliable, Rollable Texture
The primary goal for any manicotti shell is pliability. Our meticulous blend of gluten-free flours, combined with the right amount of moisture and binder, results in a dough that is surprisingly elastic and easy to roll. It won’t crack when you form it around your delicious fillings, ensuring picture-perfect results every time.
Neutral Flavor Profile
Some gluten-free flours can impart strong, unappetizing flavors. This recipe prioritizes a neutral base, allowing the rich sauces and savory fillings of your manicotti dish to be the star. The shells provide the perfect canvas without any off-notes.
Holds Fillings Without Tearing
There’s nothing more frustrating than seeing your beautiful manicotti fall apart in the oven. These shells are robust enough to hold generous amounts of ricotta, spinach, meat, or whatever your heart desires, baking up beautifully without tearing or turning to mush.
Essential Ingredients & Smart Substitutions for Gluten-Free Manicotti Shells
Here is what you need and why:
The GF Flour Blend Breakdown (why this specific blend works)
Gluten-Free All-Purpose Flour Blend (with xanthan gum): This is your workhorse. I highly recommend a high-quality blend that already contains xanthan gum, as it mimics gluten’s elasticity. Brands like King Arthur Gluten-Free All-Purpose Flour are excellent for this purpose. The combination of rice flour, tapioca starch, and potato starch creates a balanced texture that is both light and structured, unlike single-flour options which can be too gummy or sandy.
Binders and Stabilizers (eggs, xanthan gum – their roles)
Large Eggs: Eggs are crucial for binding the dough together, adding richness, and contributing to the dough’s workability and golden color. They provide necessary structure that gluten would normally offer. If you’re using a GF flour blend without added xanthan gum, you’ll need to add about 1/2 teaspoon per cup of flour to replicate the elasticity.
Xanthan Gum: If your GF flour blend doesn’t include it, xanthan gum is non-negotiable for gluten-free pasta. It acts as a hydrocolloid, providing elasticity and preventing the dough from being crumbly. Think of it as the glue that holds everything together, giving your shells that desirable chew.
Fat and Liquid Choices (olive oil, water/milk – impact on dough)
Olive Oil (extra virgin): A touch of olive oil adds subtle flavor, helps make the dough more pliable, and prevents it from drying out too quickly. It also contributes to a silky smooth texture in the cooked shells.
Warm Water or Dairy-Free Milk: The liquid component brings the dough together. Warm water is perfectly fine, but using warm dairy-free milk (like unsweetened almond or oat milk) can add a touch more richness and a slightly softer crumb to the finished shells. The warmth helps hydrate the flours more effectively.
Step-by-Step: Making Your Gluten-Free Manicotti Shells
Follow these step-by-step photos:
1. Preparing the Dough: Mixing and Resting
In a large bowl, whisk together the gluten-free flour blend, xanthan gum (if not in your blend), and salt. Create a well in the center and add the eggs, olive oil, and warm water/milk. Gradually incorporate the dry ingredients into the wet, mixing until a shaggy dough forms. Turn it out onto a lightly floured surface and knead gently for 5-7 minutes until smooth and elastic. It should feel soft and slightly tacky, but not sticky. Cover the dough tightly with plastic wrap and let it rest at room temperature for at least 30 minutes. This resting period is critical for hydrating the gluten-free flours and making the dough much easier to roll.
2. Rolling Out the Dough to Perfection
Divide your rested dough into 2-3 equal portions. Lightly flour your work surface and a rolling pin. Take one portion of dough and, starting from the center, roll it out thinly. Aim for a thickness of about 1/16 to 1/8 inch – thin enough to be pliable but not so thin that it tears easily. You should be able to see your hand faintly through it. If using a pasta machine, pass the dough through increasingly thinner settings, usually stopping at setting #4 or #5.
3. Cutting and Pre-Cooking the Shells
Once rolled, cut the dough into rectangular sections, roughly 4×5 inches. Bring a large pot of salted water to a rolling boil. Carefully drop 2-3 manicotti rectangles into the boiling water at a time. Cook for only 60-90 seconds until they are pliable and slightly softened. They should still have a good ‘al dente’ bite. Do not overcook, or they will become difficult to handle.
4. Cooling and Storing Properly
As soon as the shells are done cooking, carefully remove them with a slotted spoon and immediately plunge them into an ice bath for a full minute to stop the cooking process. This prevents them from becoming mushy and sticking together. Lay the cooled shells flat on parchment paper-lined baking sheets or a clean kitchen towel, ensuring they don’t overlap too much. Lightly brush each shell with a tiny bit of olive oil to prevent sticking before layering them for storage or use.
Expert Tips for Flawless Gluten-Free Manicotti Shells
- Don’t Overwork the Dough: While a little kneading is good to develop elasticity, excessive kneading can make gluten-free dough tough. Knead until just smooth and pliable, then let rest.
- Achieving the Right Dough Thickness: This is key! Too thick, and they’ll be bready; too thin, and they’ll tear. Aim for about the thickness of a thick playing card. When rolled out, it should be thin enough to be translucent but still hold together.
- Preventing Sticking During Assembly: Always lightly oil your workstation, your hands, and especially the cooked shells before stacking or filling. Cooked shells can be delicate, so handle with care and keep them lightly moistened.
- Troubleshooting Common Issues (cracking, tearing): If your dough is cracking while rolling, it’s too dry. Add a teaspoon of warm water or olive oil and knead it in. If shells are tearing during pre-cooking, they might be too thin or overcooked. Adjust thickness or cooking time accordingly.
- Use a Pasta Machine for Uniformity: While not essential, a pasta machine can make rolling out uniform, thin sheets much easier and more consistent than by hand.
- Source Quality Ingredients: The quality of your gluten-free flour blend makes a significant difference in the final product. Invest in a reputable brand.
Serving Suggestions: What to Pair with Your Homemade Manicotti
Classic Marinara and Cheesy Fillings
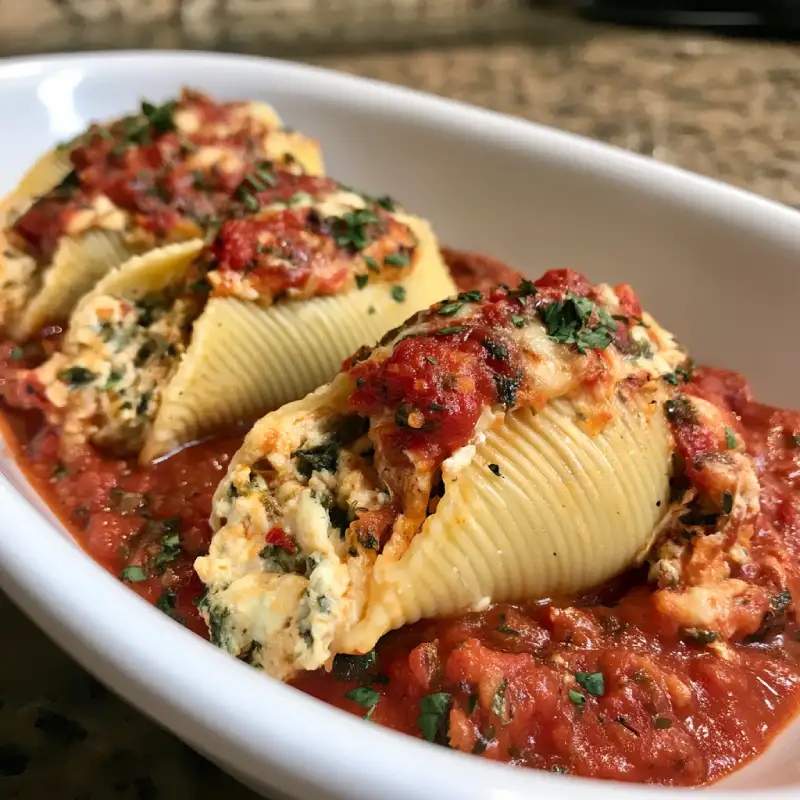
The quintessential pairing! Stuff your homemade gluten free manicotti shells with a creamy ricotta, Parmesan, and mozzarella blend, perhaps with some fresh spinach. Drown them in a rich, slow-simmered marinara sauce and bake until bubbly and golden. A sprinkle of fresh basil before serving elevates this timeless dish.
Creamy White Sauces and Veggie Combinations
Don’t limit yourself to red sauce! These versatile shells are also fantastic with a velvety Alfredo or béchamel sauce. Consider fillings like roasted butternut squash and sage, a medley of sautéed mushrooms and herbs, or even a creamy chicken and broccoli mixture. Top with extra Parmesan and bake for a comforting, elegant meal.
Complementary Side Dishes
Round out your manicotti feast with some simple, fresh sides. A crisp green salad with a light vinaigrette perfectly balances the richness of the pasta. Garlic bread (gluten-free, of course!) for dipping into the extra sauce is always a hit. Steamed or roasted asparagus, green beans, or a side of sautéed zucchini would also be wonderful additions.
Storing and Reheating Your Gluten-Free Manicotti Shells
Proper storage is key to enjoying your homemade gluten free manicotti shells for future meals!
Short-Term Storage (refrigeration)
Unfilled, Pre-cooked Shells: Once cooled and lightly oiled (to prevent sticking), stack the shells with parchment paper between each layer and place them in an airtight container. They will keep in the refrigerator for up to 3 days. When ready to use, gently separate them and fill as desired.
Filled & Sauced Manicotti (as a complete dish): If you’ve already assembled and baked your manicotti, allow it to cool completely. Cover tightly with foil or plastic wrap and refrigerate for up to 3-4 days. The sauce helps keep the shells moist.
Long-Term Storage (freezing cooked or uncooked)
Unfilled, Pre-cooked Shells: After cooling and oiling, lay individual shells flat on a baking sheet and freeze until solid (1-2 hours). Once frozen, transfer them to a freezer-safe bag or container, separating layers with parchment paper. They will keep for up to 2-3 months. Thaw in the refrigerator overnight before filling.
Filled Manicotti (uncooked and assembled): Assemble your manicotti as usual, but do not bake. Place the sauced and filled manicotti in a freezer-safe aluminum pan. Cover tightly with two layers of foil. Freeze for up to 3 months. To bake, remove foil and bake from frozen at 375°F (190°C) for 60-75 minutes, or until heated through and bubbly, adding more sauce if needed.
Baked Manicotti: If you have leftovers of baked manicotti, allow it to cool completely. Portion into individual servings or an oven-safe container, cover tightly, and freeze for up to 2 months. Great for quick weeknight meals!
Best Reheating Methods
From Refrigerated: For assembled and baked manicotti, cover with foil and reheat in a preheated oven at 350°F (175°C) for 20-30 minutes, or until hot and bubbly. Individual servings can be microwaved briefly, but oven reheating is best for texture.
From Frozen (Pre-baked): Thaw in the refrigerator overnight if possible, then reheat as above. If baking from frozen, add an additional 30-45 minutes to the baking time, ensuring it’s covered for most of the cooking to prevent drying out.
Frequently Asked Questions About Gluten-Free Manicotti Shells
Can I make these vegan?
Can I use a different gluten-free flour blend?
How do I prevent shells from sticking when baking?
Can I make these ahead of time?
Delicious Gluten Free Manicotti Shells
- Total Time: 32 minutes
- Yield: 12-16 shells
Description
Craft perfect gluten-free manicotti shells from scratch with this detailed, step-by-step recipe. Enjoy pliable, flavorful pasta that holds up beautifully to your favorite fillings.
Ingredients
- 2 cups (240g) high-quality Gluten-Free All-Purpose Flour Blend (with xanthan gum)
- 1/2 teaspoon xanthan gum (omit if already in your GF flour blend)
- 1/2 teaspoon salt
- 2 large eggs
- 2 tablespoons olive oil
- 1/4 to 1/2 cup warm water or unsweetened dairy-free milk (adjust as needed)
Instructions
- 1. Mix the Dry Ingredients: In a large bowl, whisk together the GF flour blend, xanthan gum (if using), and salt.
- 2. Combine Wet Ingredients: Create a well in the center of the dry ingredients. Add the eggs, olive oil, and 1/4 cup of warm water/milk.
- 3. Form the Dough: Gradually incorporate the dry ingredients into the wet, mixing until a shaggy dough forms. Add more liquid, a tablespoon at a time, if the dough is too dry.
- 4. Knead and Rest: Turn the dough out onto a lightly floured surface and knead gently for 5-7 minutes until smooth and elastic. It should be soft and slightly tacky. Cover tightly with plastic wrap and rest for at least 30 minutes.
- 5. Roll Out Dough: Divide the dough into 2-3 portions. On a lightly floured surface (or using a pasta machine), roll out each portion to about 1/16 to 1/8 inch thick.
- 6. Cut Shells: Cut the rolled dough into approximately 4×5 inch rectangles.
- 7. Pre-Cook Shells: Bring a large pot of salted water to a rolling boil. Cook 2-3 shells at a time for 60-90 seconds until pliable.
- 8. Cool and Store: Immediately transfer cooked shells to an ice bath, then lay them flat on parchment paper, brushing lightly with olive oil to prevent sticking. Use immediately or store as directed.
- Prep Time: 30 mins
- Cook Time: 2 mins (for shells)