
Homemade Pumpkin Cat Treats: A Healthy Bite for Your Feline Friend
Are you looking for a wholesome, delicious way to pamper your feline friend? Imagine handing your cat a perfectly baked, slightly chewy, and irresistibly aromatic treat that you made yourself! These pumpkin cat treats are not just a snack; they’re a gesture of love, packed with wholesome ingredients that will have your cat purring for more. They strike the perfect balance between a soft, pliable texture that’s easy for even the pickiest eater to enjoy, and a subtle, enticing flavor that comes purely from natural ingredients. You’ll find more easy and delightful recipes to try right here at Food by Steps!
Why DIY Matters: Benefits of Homemade Cat Treats
Making your own cat treats gives you complete control over what goes into your pet’s diet. No mysterious fillers, no artificial flavors, just pure, simple goodness. This means a healthier snack for your cat and peace of mind for you.
Table of Contents
- How This Recipe Works
- Ingredients and Smart Substitutions
- Step-by-Step Instructions: Baking Pumpkin Cat Treats
- Expert Tips for Success
- What to Serve With Pumpkin Cat Treats
- Storing and Reheating Your Homemade Treats
- Frequently Asked Questions About Pumpkin Cat Treats
How This Recipe Works: Simple, Wholesome Ingredients for Happy Cats
The beauty of these pumpkin cat treats lies in their simplicity and the power of a few key ingredients working together.
- Pure Pumpkin: Provides essential fiber for digestive health and is packed with vitamins like A and C.
- Whole Wheat Flour: Offers a sturdy texture and provides whole-grain sustenance.
- Egg: Acts as a natural binder and adds a boost of protein.
- Catnip (Optional): Makes these treats extra enticing for those cats who can’t resist it.
Ingredients and Smart Substitutions
Canned Pumpkin Purée: Ensure it is 100% pure canned pumpkin, not pie filling.
Whole Wheat Flour: Choose it for nutritional benefits and sturdy texture; oat flour or rice flour can be used as alternatives.
One Large Egg: Crucial for binding; a flax egg can be a substitute for cats with rare egg allergies.
Optional Add-ins: Dried catnip or nutritional yeast can add extra flavor and B vitamins.
Step-by-Step Instructions: Baking Pumpkin Cat Treats
1. Preheat and Prep:
Preheat your oven to 350°F (175°C) and line a baking sheet with parchment paper.
2. Combine Dry Ingredients:
Whisk together the whole wheat flour and any optional dry add-ins.
3. Mix Wet Ingredients:
Whisk the pumpkin purée and egg until smooth.
4. Form the Dough:
Gradually add dry ingredients to wet, stirring until a cohesive, firm dough forms.
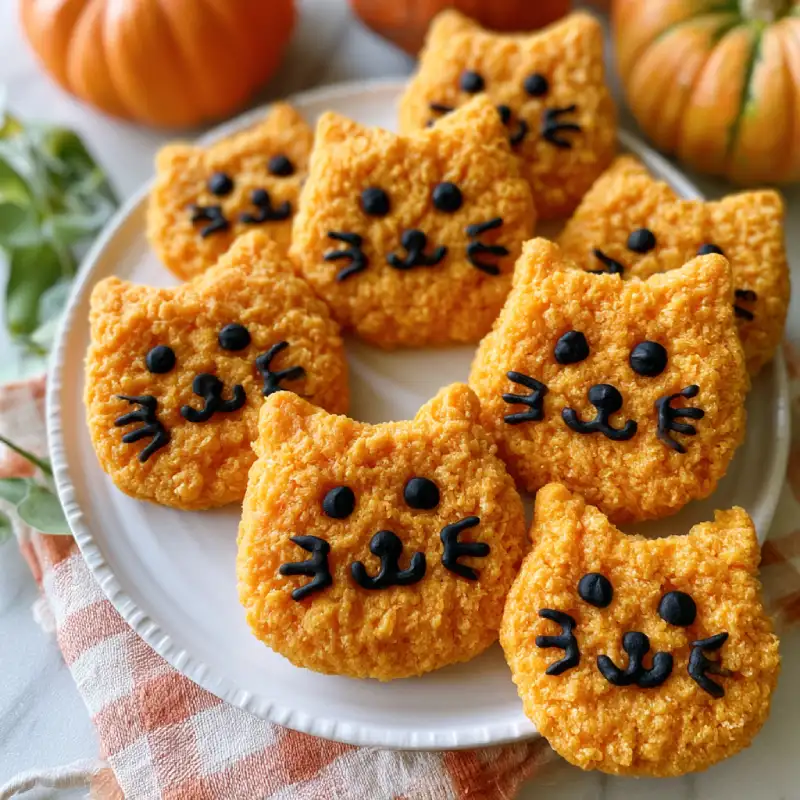
5. Roll and Cut:
Roll to ¼-inch thickness and cut with small cookie cutters.
6. Bake:
Bake for 15-20 minutes, or until edges are lightly golden and treats are firm.
7. Cool:
Transfer to a wire rack and let cool completely to prevent moisture buildup.
Expert Tips for Success
- Consistency: Aim for a consistency similar to play-dough; add flour if too sticky or water if too crumbly.
- Shapes: Use small cat-themed cookie cutters to make treat time fun.
- Shelf Life: Bake for 5-10 minutes longer if you prefer crunchier treats with a longer shelf life.
- Storage Prep: Cooling completely is vital to prevent mold growth.
What to Serve With Pumpkin Cat Treats
These treats can be used as a daily reward, motivation during playtime, or positive reinforcement during training sessions.
Storing and Reheating Your Homemade Treats
- Room Temp: Store in an airtight container for 3-4 days.
- Fridge: Store for up to 1-2 weeks.
- Freezer: Freeze for up to 2-3 months.
Frequently Asked Questions About Pumpkin Cat Treats
Are pumpkin cat treats safe for all cats?
Generally yes, but ensure you use plain, 100% pumpkin purée. Consult your veterinarian if your cat has specific dietary restrictions. Can I use fresh pumpkin instead of canned?
Yes, cook and purée fresh pumpkin until smooth, ensuring there are no solid bits, and let it cool completely before use.
Print