
Why This Lectin-Free Bread Recipe is a Game Changer
Imagine biting into a slice of bread so wonderfully soft and subtly flavored, you’d never guess it was lectin-free. That’s precisely the experience I’m thrilled to share with you today! After years of navigating the world of dietary restrictions, and let me tell you, it’s been a journey of many flour-dusted kitchen adventures, I’ve finally perfected a lectin-free bread recipe that doesn’t just ‘pass’ – it shines! This isn’t just another health food compromise; this is genuinely delicious, satisfying bread that will make you forget about its lectin-containing counterparts. See more easy recipes!
My Journey to Lectin-Free Baking: Like many of you, I embarked on a lectin-free lifestyle seeking better health and improved digestion. But oh, the lament for real, satisfying bread! Early attempts often yielded dense, crumbly bricks or oddly flavored concoctions. It was a disheartening cycle of trial and error, but my determination never wavered. I believed a truly great lectin-free loaf was possible, and I was committed to cracking the code.
You Can Bake Delicious Lectin-Free Bread: And now, after countless experiments, I’m beyond excited to tell you that you absolutely can bake delicious lectin-free bread right in your own kitchen! This recipe is the culmination of all those trials and triumphs, designed to be straightforward and rewarding. It’s proof that you don’t have to sacrifice flavor or texture to adhere to your dietary needs. Get ready to enjoy the aroma of freshly baked bread filling your home once again!
How This Recipe Works: Texture and Flavor Profile
What makes this lectin free bread so special? It’s all in the meticulous balance of ingredients and techniques, resulting in a bread that truly delights the senses.
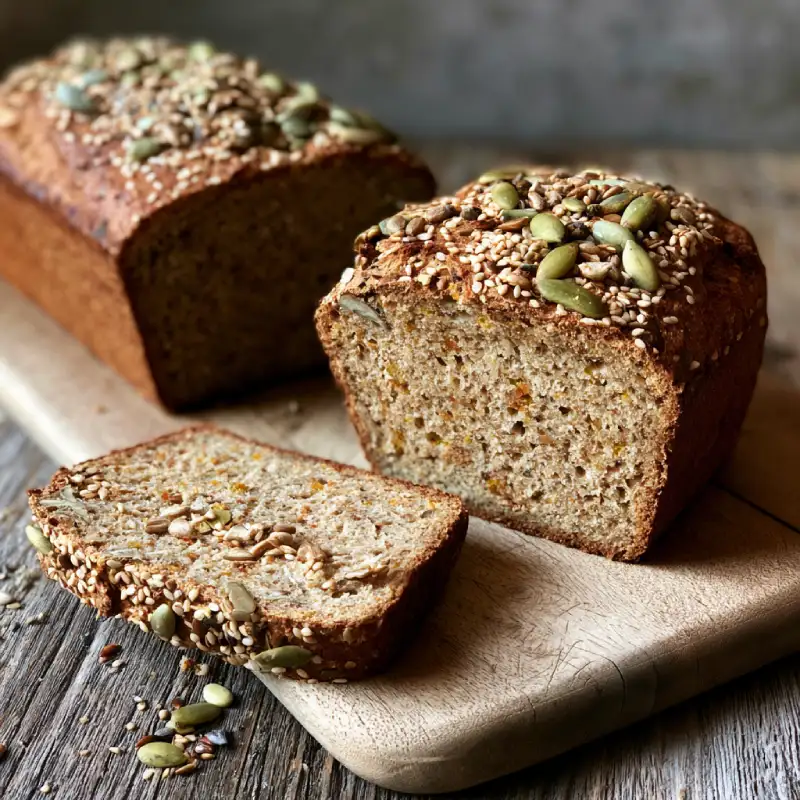
- Light and Airy Crumb: Forget the dense, gummy texture often associated with gluten-free or alternative flour breads. This recipe produces a surprisingly light and open crumb, making each bite a pleasure. It tears beautifully and isn’t heavy on the stomach.
- Golden, Slightly Chewy Crust: The exterior boasts a gorgeous golden-brown hue with a satisfying, slightly chewy bite. It’s robust enough to hold its shape but never tough, adding a delightful contrast to the soft interior.
- Neutral Flavor, Perfect for Pairings: This isn’t a bread that overwhelms; instead, it offers a wonderfully neutral flavor profile that makes it incredibly versatile. It’s the perfect canvas for both sweet and savory toppings, letting your chosen accompaniments shine.
Ingredients and Substitutions: The Science Behind the Loaf
Here is what you need and why:
Flour Blend: Why Almond Flour and Arrowroot Powder? Our star players in this lectin free bread are a dynamic duo. Almond flour, rich in protein and healthy fats, provides structure and a delicate, nutty flavor without the lectins. It’s naturally low-carb and readily available. Arrowroot powder (sometimes called arrowroot starch) acts as a fantastic thickener and binder. It lends a wonderful lightness and helps create that coveted airiness in the crumb, preventing the bread from becoming too dense. Avoid cornstarch as a substitute, as it contains lectins.
Binding Agents: Psyllium Husk Powder is Key: This is arguably the most crucial ingredient for success in lectin-free and gluten-free baking! Psyllium husk powder (ensure it’s finely ground) mimics gluten, providing elasticity and binding properties that are essential for a good bread texture. It helps the dough hold together, prevents crumbling, and aids in the overall structure and rise. Do not skip this! Whole psyllium husks can be used, but you might need slightly more, and the texture might be a little different.
Leavening: Baking Soda and Apple Cider Vinegar Explained: This classic combination is our chemical leavening agent. Baking soda (sodium bicarbonate) is a base, and when it reacts with the acid in apple cider vinegar, it produces carbon dioxide bubbles, which are trapped in the dough, causing it to rise beautifully. This reaction happens quickly, so it’s important to work efficiently once they are combined. Ensure your baking soda is fresh for optimal results.
Fats: Olive Oil for Moisture and Flavor: A good quality extra virgin olive oil not only adds wonderful moisture to the bread, ensuring it doesn’t dry out too quickly, but also imparts a subtle, pleasant flavor that complements the neutral flour blend. You could use avocado oil as an alternative, but olive oil is my preferred choice for its taste and health benefits.
Liquid: Understanding Water Temperature: The temperature of your water is more important than you might think! Lukewarm water (around 105-115°F or 40-46°C) helps to activate the psyllium husk, allowing it to swell and create that gel-like consistency crucial for binding. It also aids in the overall texture development. Too hot, and it can ‘cook’ the psyllium; too cold, and it won’t activate properly.
Salt: Essential for enhancing flavor. I always use fine sea salt.
Optional: Egg: A single large egg (pasture-raised, if possible) adds extra binding, richness, and helps with browning. If you’re egg-free, you can try a ‘flax egg’ (1 tbsp ground flaxseed mixed with 3 tbsp water, let sit 5 mins), though the texture may vary slightly.
Step-by-Step Instructions: Your Visual Baking Guide
Follow these step-by-step instructions to bake your perfect lectin free bread:
1. Prep Your Ingredients and Equipment
Start by gathering all your ingredients and measuring them out precisely. This ensures you’re not scrambling during the mixing process. Preheat your oven to 375°F (190°C). Lightly grease a standard loaf pan (8.5 x 4.5 inches or 9 x 5 inches) or line it with parchment paper for easy removal. Accuracy here is key for consistent results.
2. Combine Dry Ingredients Precisely
In a large mixing bowl, whisk together the almond flour, arrowroot powder, psyllium husk powder, baking soda, and salt. Whisking thoroughly ensures all ingredients are evenly distributed, which is vital for an even rise and texture. Break up any lumps in the almond flour.
3. Incorporate Wet Ingredients for the Right Consistency
In a separate bowl, whisk the lukewarm water with the apple cider vinegar, olive oil, and optional egg (if using). Pour the wet ingredients into the dry ingredients. Mix with a sturdy spoon or a stand mixer with a paddle attachment until just combined. The mixture will be thick and somewhat sticky – this is exactly what we’re looking for! Overmixing can result in a tougher bread.
4. Kneading (or mixing) for Structure
Once combined, let the dough rest for about 5-10 minutes. This allows the psyllium husk to fully absorb the liquid and form its gel. Then, with lightly oiled hands, briefly ‘knead’ the dough within the bowl for about 1-2 minutes. This isn’t traditional kneading; it’s more about ensuring the psyllium gel is fully developed and distributed, which creates a more unified structure. Shape the dough into a loaf and place it into your prepared loaf pan.
5. Proofing: The Importance of a Warm Environment
Cover the loaf pan with a clean kitchen towel and place it in a warm, draft-free spot. This ‘proofing’ stage allows the baking soda and vinegar reaction to continue, helping the bread achieve its final rise before baking. Aim for about 20-30 minutes, or until the dough has noticeably puffed up. A slightly warm oven (turned off, with the light on) can be an ideal proofing environment.
6. Baking for a Perfect Crust and Crumb
Bake in your preheated oven for 45-55 minutes. The bread should be golden brown on top and sound hollow when thumped on the bottom. An instant-read thermometer inserted into the center should register around 200-210°F (93-99°C). If the top starts to brown too quickly, you can loosely tent it with aluminum foil. For an extra crispy crust, you can remove the bread from the pan for the last 10 minutes of baking.
Expert Tips for Lectin-Free Bread Success
- Don’t Overmix the Dough: While we need to ensure everything is combined, excessive mixing can lead to a tougher bread. Mix just until no dry streaks remain.
- Achieving the Right Proofing Temperature: A warm (but not hot) environment is crucial for a good rise. Too cold, and it won’t rise; too hot, and it can kill the leavening action. Around 75-85°F (24-29°C) is ideal.
- Adjusting Baking Time for Your Oven: Every oven is different! Keep an eye on your bread, especially towards the end of the baking time. If it browns too quickly, tent with foil. Use the internal temperature as the most reliable indicator of doneness.
- Cooling Completely Before Slicing: This is perhaps the hardest tip to follow, but it’s vital! Allow the bread to cool completely on a wire rack before slicing. This allows the internal structure to set fully and prevents a gummy texture. Patience will be rewarded!
- Measure Precisely: Especially with alternative flours and psyllium husk, minor differences in measurement can significantly impact the final texture. Use a kitchen scale for best accuracy, especially for flours and psyllium.
What to Serve with Your Lectin-Free Bread
This versatile lectin free bread is a dream come true for meal planning! Its neutral flavor makes it a perfect companion for almost anything.
- Savory Spreads and Toppings: Think creamy avocado smash with a sprinkle of everything bagel seasoning, a generous smear of homemade sugar-free pesto, olive tapenade, or a good quality grass-fed ghee. It’s also fantastic alongside hearty soups and stews.
- Sweet Pairings: For a delightful treat, try it toasted with a dab of fruit-sweetened jam, a drizzle of maple syrup, or sugar-free chocolate hazelnut spread. A sprinkle of cinnamon and a touch of coconut butter would also be divine.
- Making Sandwiches and Toasts: This bread holds up beautifully for sandwiches! Layer it with your favorite compliant meats, cheeses (if you include them), and fresh veggies. It also makes for incredible toast – simply slice, toast, and top with whatever your heart desires!
Storing and Reheating Your Lectin-Free Loaf
To enjoy your delicious lectin free bread for as long as possible, proper storage is key.
- Best Practices for Freshness: Once completely cooled, store the bread in an airtight container at room temperature for up to 2-3 days. You can also wrap it tightly in plastic wrap or beeswax wrap, then place it in a bread bag.
- Freezing for Longer Storage: This bread freezes wonderfully! Slice the cooled loaf before freezing, then place slices in a single layer on a baking sheet to flash freeze for about 30 minutes. Transfer the frozen slices to a freezer-safe bag or container, separating layers with parchment paper. It will keep well for up to 2-3 months.
- Reheating for Optimal Taste and Texture: To reheat, slices can be toasted directly from frozen. For a whole loaf, thaw at room temperature, then wrap in foil and warm in a 300°F (150°C) oven for about 10-15 minutes, or until warmed through. This can help revive some of that fresh-baked quality.
Lectin-Free Bread FAQ
Can I use other lectin-free flours?
What if my dough doesn’t rise?
Is this recipe gluten-free?
How can I tell if my bread is fully cooked?
Easy Lectin-Free Bread
- Total Time: 26 minute
- Yield: 1 standard loaf (10-12 slices)
Description
Discover the best lectin free bread recipe with our step-by-step guide. Easy to bake, best flavor, and perfect for your dietary needs.
Ingredients
- 2 cups (224g) super-fine almond flour
- ½ cup (64g) arrowroot powder
- ¼ cup (24g) psyllium husk powder (finely ground)
- 1 ½ teaspoons baking soda
- ½ teaspoon fine sea salt
- 1 ½ cups (360ml) lukewarm water (105-115°F / 40-46°C)
- 2 tablespoons apple cider vinegar
- 2 tablespoons extra virgin olive oil
- 1 large egg (optional, for richer texture and browning)
Instructions
- 1. Prep Your Ingredients and Equipment: Preheat your oven to 375°F (190°C). Lightly grease a standard loaf pan (8.5 x 4.5 inches or 9 x 5 inches) or line it with parchment paper.
- 2. Combine Dry Ingredients Precisely: In a large mixing bowl, whisk together the almond flour, arrowroot powder, psyllium husk powder, baking soda, and salt until thoroughly combined.
- 3. Incorporate Wet Ingredients for the Right Consistency: In a separate bowl, whisk the lukewarm water with the apple cider vinegar, olive oil, and optional egg (if using). Pour the wet ingredients into the dry ingredients. Mix with a sturdy spoon or a stand mixer until just combined. The mixture will be thick and sticky.
- 4. Kneading (or mixing) for Structure: Let the dough rest for 5-10 minutes. With lightly oiled hands, briefly ‘knead’ the dough within the bowl for 1-2 minutes to ensure the psyllium gel is fully developed. Shape the dough into a loaf and place it into your prepared loaf pan.
- 5. Proofing: The Importance of a Warm Environment: Cover the loaf pan with a clean kitchen towel and place it in a warm, draft-free spot for 20-30 minutes, or until the dough has noticeably puffed up.
- 6. Baking for a Perfect Crust and Crumb: Bake in your preheated oven for 45-55 minutes, or until golden brown and an internal temperature of 200-210°F (93-99°C) is reached. If desired, remove from the pan for the last 10 minutes of baking for a crispier crust.
- 7. Cool Completely: Remove from the oven and transfer the bread to a wire rack. Cool completely before slicing to allow the internal structure to set.
- Prep Time: 15 mins
- Cook Time: 45-55 mins