
Table of Contents
- Introduction: Why These Pink Gummies Are a Must-Make
- How This Pink Gummy Recipe Works
- Ingredients and Smart Substitutions for Your Pink Gummies
- Step-by-Step Instructions: Making Your Pink Gummies
- Expert Tips for Pink Gummy Success
- What to Serve With Your Pink Gummies
- Storing and Reheating Pink Gummies
- Pink Gummies FAQ
Introduction: Why These Pink Gummies Are a Must-Make
Get ready to elevate your snack game with these absolutely delightful pink gummies! Imagine a bite-sized burst of fruity flavor, perfectly chewy, and with that undeniable jiggly bounce that makes gummies such a joy. Forget store-bought; once you taste the fresh, vibrant difference of homemade, you’ll be hooked. This recipe isn’t just about making candy; it’s about creating a moment of pure, unadulterated joy. These are so much more than just a sweet treat; they’re a simple pleasure that comes to life right in your kitchen. And if you’re like me, constantly seeking delicious, yet achievable recipes, you’ll want to See more good recipes here to fill your culinary arsenal.
My Secret to Perfect Pink Gummies Every Time
My secret lies in a careful balance of gelatin bloom time, precise liquid ratios, and a few clever tricks to intensify that gorgeous pink hue and delicious fruit flavor. I’ve perfected this method over countless batches, ensuring every gummy comes out with that ideal chew and vibrant taste. It’s truly a game-changer!
Effortless Treat for Any Occasion
Whether you’re planning a party, looking for a wholesome snack for the kids, or simply craving something sweet and satisfying, these pink gummies are your answer. They’re incredibly simple to make, require no baking, and can be customized to suit any taste or dietary preference. Plus, they look absolutely adorable!
How This Pink Gummy Recipe Works
- Achieving the Ideal Chewy Texture: We’ll be using specific types of gelatin and a measured amount of liquid to ensure your gummies aren’t too soft or too hard, striking that perfect balance of chewiness.
- Maximizing Fruity Flavor: The key here is using high-quality fruit juice and, optionally, natural flavor extracts or zest to create a deeply satisfying fruit explosion in every bite.
- The Simplicity of No-Bake: This recipe simplifies the candy-making process, making it accessible even for beginners. No oven required, just a microwave or stovetop for gentle heating.
Ingredients and Smart Substitutions for Your Pink Gummies
Here is what you need and why:
Gelatin: The Foundation of Chewiness (Why Type Matters): For the best texture in your pink gummies, I highly recommend using unflavored powdered gelatin. Brands like Knox are readily available and consistent. I typically use two types: bovine gelatin for a firmer, chewier gummy, or porcine gelatin for a slightly softer, more jiggly texture. The type of gelatin (specifically its bloom strength) directly impacts the chewiness; higher bloom strength means a firmer set. Don’t confuse it with gelatine sheets, as the measurement conversions are different.
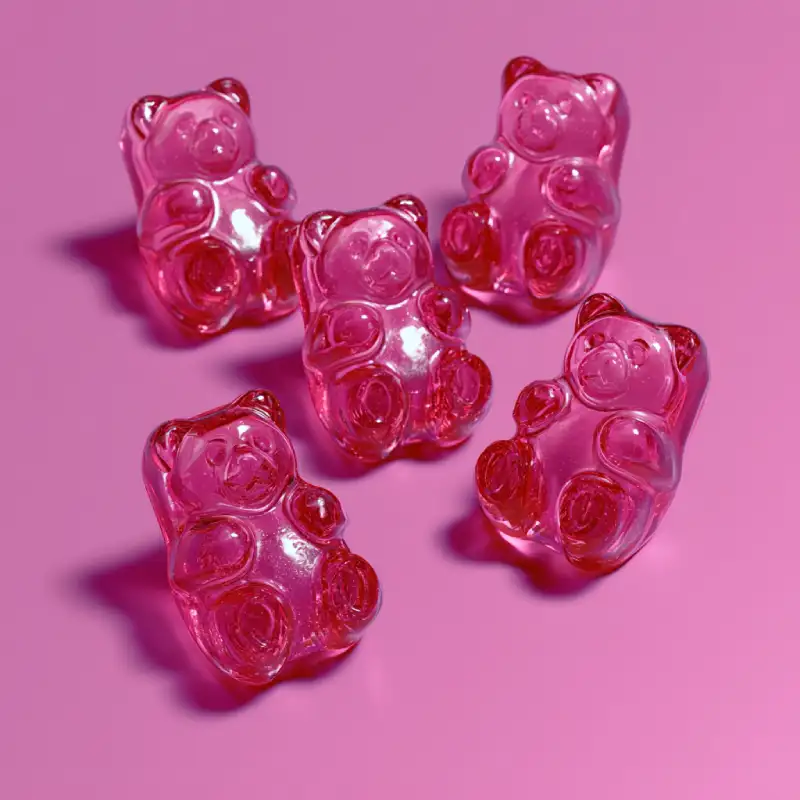
Fruit Juice: For Vibrant Color and Flavor (Best Choices & pH Impact): This is where the ‘pink’ comes from! My top recommendations for vibrant pinks and delicious flavors are pomegranate juice, cranberry juice, raspberry juice, or a blend. Always opt for 100% fruit juice with no added sugars for the purest flavor. Be mindful that very acidic juices (low pH) can sometimes interfere with gelatin’s setting power, so if using extremely tart juices, you might need a tiny bit more gelatin.
Sweetener: Balancing the Tang (Adjusting to Taste): Depending on the sweetness of your chosen fruit juice, you’ll want to add a sweetener. Granulated sugar, honey, or maple syrup all work beautifully. Start with a smaller amount and taste as you go; you can always add more. For a sugar-free option, erythritol or stevia blends can be used, but note that they might slightly alter the texture.
Natural Color Boosters (Optional but Recommended): To truly make your pink gummies pop, consider adding a tiny amount of natural food coloring, like beet powder or a splash of red fruit puree. This deepens the hue without artificial ingredients. A couple of drops of natural red food coloring also does the trick!
Optional Flavor Enhancers: A drop or two of natural vanilla extract, almond extract, or even a tiny amount of lemon zest can really enhance the overall flavor profile.
Step-by-Step Instructions: Making Your Pink Gummies
Follow these simple steps to create your perfect pink gummies:
1. Prepping Your Molds and Workspace
Before you begin, lightly grease your silicone gummy molds with a flavorless oil (like coconut or grapeseed oil) or a tiny bit of non-stick spray. This step is crucial for easy unmolding! Have your molds ready on a baking sheet or firm surface for easier transport to the fridge.
2. Blooming the Gelatin: The Key to Smoothness
In a small saucepan, pour about half of your chosen fruit juice. Sprinkle the unflavored gelatin powder evenly over the cold juice. Allow it to sit for 5-10 minutes (this is called blooming). The gelatin will absorb the liquid and swell, preventing lumps when heated.
3. Gently Heating and Combining Ingredients
Place the saucepan over low heat. Add the remaining fruit juice, your chosen sweetener, and any optional flavor enhancers or color boosters. Stir gently but continuously until the gelatin is completely dissolved and the mixture is warm but not boiling. Boiling can reduce gelatin’s setting power. The mixture should be smooth and liquid, with no grainy texture.
4. Pouring and Chilling for Perfect Set
Carefully pour the warm gummy mixture into your prepared molds. A dropper or a small squeeze bottle can be very helpful here to avoid spills. Transfer the molds to the refrigerator and chill for at least 2-4 hours, or until the gummies are firm and fully set. Don’t rush this step!
5. Unmolding and Enjoying
Once fully set, gently press the bottom of each silicone cavity to release your beautiful pink gummies. They should pop out easily if well-greased. Arrange them on a plate and enjoy your delicious homemade treat!
Expert Tips for Pink Gummy Success
- Troubleshooting Common Gummy Issues (Too Soft, Too Hard): If your gummies are too soft, you might need a little more gelatin next time or ensure you didn’t boil the mixture. If they’re too hard, you might have used too much gelatin; reduce it slightly in your next batch.
- Achieving Different Shades of Pink: Play with different pink juices! Pomegranate gives a deep fuchsia, while cranberry is brighter. A tiny drop of natural red food coloring can amplify any shade. Beet powder can also create a natural, earthy pink.
- Infusing Additional Flavors (Extracts, Zests): Don’t stop at just fruit juice! Add a tiny splash of vanilla, almond, or even rose extract for a sophisticated twist. A bit of fresh lemon or orange zest can add a beautiful aromatic lift.
- Mold Choices: Silicone vs. Others: Silicone molds are by far the easiest for gummy making due to their flexibility for unmolding. If using plastic or metal molds, ensure they are well-greased and consider lining with parchment paper if necessary, though silicone is truly superior for this purpose. Find some great silicone mold options over at King Arthur Baking, they have quality kitchen tools!
What to Serve With Your Pink Gummies
These versatile pink gummies are perfect on their own, but here are some ideas to elevate your serving:
- Party Favors and Dessert Plates: Arrange them artfully on a dessert platter or package them in small, clear bags for charming party favors. They add a pop of color to any spread.
- Refreshing Drink Pairings: Pair them with a glass of sparkling water, lemonade, or even a light herbal iced tea for a refreshing treat. They also make a fun garnish for cocktails or mocktails.
- Creative Garnish Ideas: Dust them lightly with a tiny bit of powdered sugar for a snowy effect, or roll them in a mixture of sugar and citric acid for a sour gummy experience.
Storing and Reheating Pink Gummies
Proper storage is key to keeping your pink gummies fresh and delicious.
- Optimal Storage for Freshness: Store your homemade gummies in an airtight container at room temperature for up to 5-7 days. If you live in a very warm climate, or for extended freshness, refrigerate them.
- Freezing Pink Gummies (Yes, You Can!): While technically possible, freezing gummies can alter their texture, making them slightly grainier or softer upon thawing. If you choose to freeze, place them in a freezer-safe, airtight container, separated by parchment paper, for up to 1 month.
- Reviving Stiff Gummies: If your gummies become a bit stiff, simply let them sit at room temperature for 15-30 minutes, and they should regain some of their original chewiness.
Pink Gummies FAQ
Can I use agar-agar instead of gelatin?
How long do pink gummies last?
Why are my gummies sticky?
Can I make these sugar-free?
Pink Gummies: Delicious No-Bake Recipe
- Total Time: 20 minutes
- Yield: Approx. 60 small gummies (depending on mold size)
Description
Learn how to make delicious pink gummies with this step-by-step recipe. Easy to make and best flavor guaranteed!
Ingredients
- 1/2 cup cold pink fruit juice (cranberry, pomegranate, raspberry)
- 3–4 tablespoons unflavored gelatin powder (depending on desired firmness)
- 1/2 cup pink fruit juice (room temperature)
- 2–4 tablespoons granulated sugar or preferred sweetener (to taste)
- 1/4 teaspoon natural vanilla extract (optional)
- 1–2 drops natural red food coloring or pinch of beet powder (optional, for vibrant color)
Instructions
- Prep Molds: Lightly grease your silicone gummy molds with a flavorless oil.
- Bloom Gelatin: Pour 1/2 cup cold juice into a small saucepan. Sprinkle gelatin powder evenly over it. Let sit for 5-10 minutes to bloom.
- Heat & Combine: Add the remaining 1/2 cup juice, sugar, vanilla extract (if using), and food coloring (if using) to the saucepan. Heat over low heat, stirring constantly, until gelatin is fully dissolved and mixture is warm but not boiling.
- Pour: Carefully pour the mixture into your prepared silicone molds.
- Chill: Refrigerate for 2-4 hours, or until gummies are completely firm.
- Unmold & Enjoy: Gently pop the gummies out of the molds and enjoy!
- Prep Time: 15 mins
- Cook Time: 5 mins