
Table of Contents
- Our Go-To Gluten-Free Dairy-Free Protein Bars
- How This Recipe Works
- Key Ingredients and Smart Substitutions
- Step-by-Step Instructions for Perfect Protein Bars
- Expert Tips for Success
- What to Serve With Your Protein Bars
- Storing and Reheating Your Protein Bars
- Frequently Asked Questions About Gluten-Free Dairy-Free Protein Bars
Our Go-To Gluten-Free Dairy-Free Protein Bars
Imagine biting into a protein bar that’s perfectly chewy, not at all dry, and bursts with a satisfying, wholesome flavor. Our gluten-free dairy-free protein bars deliver precisely that – a delightful blend of rich taste and fantastic texture that honestly makes you forget they’re packed with goodness. They’re not those chalky, artificial bars you find in stores; these are genuinely delicious, homemade powerhouses. Trust us, once you try these, you’ll be ditching the store-bought versions for good! And if you’re looking for more fantastic, easy-to-follow recipes to elevate your kitchen game, you can See more good recipes here.
Why This Recipe Is a Family Favorite
This recipe has truly become a staple in our household because it ticks all the boxes: it’s quick to prepare, incredibly customizable, and universally loved. From busy mornings when grabbing something nutritious is key, to post-workout fuel, or even as a guilt-free sweet treat, these bars come to the rescue. They offer a fantastic way to ensure everyone gets a decent dose of protein and fiber without compromising on flavor or dealing with dietary restrictions.
Balancing Nutrition and Flavor: Our Approach
Our philosophy with these protein bars, and indeed with much of our baking, is to achieve that elusive balance between robust nutrition and irresistible flavor. We don’t believe you should have to sacrifice taste for health, or vice-versa. This recipe uses whole, natural ingredients that contribute both essential nutrients and incredible taste. The result is a bar that satisfies cravings, provides sustained energy, and genuinely tastes amazing. It’s real food, made simple and utterly delicious.
How This Recipe Works
Achieving the Perfect Chewy Texture
The secret to the perfect chewy texture in these gluten-free dairy-free protein bars lies in a careful combination of binding agents and the right baking temperature. We use a blend of sticky ingredients like nut butter and dates, which not only contribute natural sweetness but also create a pliable, dense, and satisfying chew. Baking at a moderate temperature ensures the bars cook through without becoming dry or crumbly, locking in that desirable moist, chewy consistency.
Flavor Profile: Perfectly Sweet with a Hint of Crunch
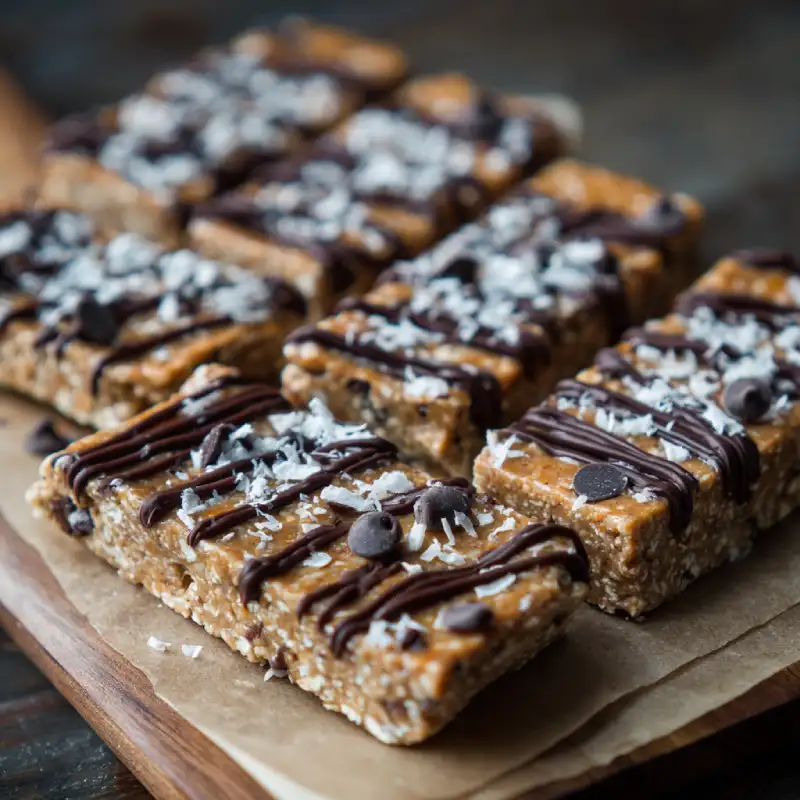
These bars boast a balanced flavor profile that hits all the right notes: naturally sweet, subtly rich, and with a delightful textural contrast from added nuts or seeds. The sweetness comes primarily from natural sources like dates and a touch of maple syrup, avoiding any overly sugary taste. The chosen protein powder subtly enhances the overall flavor without dominating, and a sprinkle of chocolate chips or a handful of chopped nuts adds that irresistible hint of crunch that elevates every bite.
Why These Bars Hold Up for On-the-Go Snacking
One of the best advantages of these gluten-free dairy-free protein bars is their incredible stability and portability, making them ideal for on-the-go snacking. Their dense, compact nature means they won’t crumble in your bag, and their wholesome ingredients provide sustained energy to keep you going throughout your day. Whether you’re heading to the gym, packing a lunch, or need a quick pick-me-up during a busy afternoon, these bars are the perfect, mess-free solution.
Key Ingredients and Smart Substitutions
Protein Powder: The Best Gluten-Free Dairy-Free Options and Why
For these gluten free dairy free protein bars, the choice of protein powder is crucial. You’ll want to opt for a high-quality plant-based protein powder such as pea protein, brown rice protein, or a mixed plant-based blend. These powders are naturally gluten-free and dairy-free, making them suitable for restricted diets. My personal favorite is an unflavored or vanilla pea protein powder because it has a neutral taste that blends seamlessly without imparting any ‘grassy’ or strong aftertaste. Ensure your protein powder does not contain any added sugars or artificial sweeteners if you prefer a more natural product. For a deeper dive into choosing quality ingredients, check out resources like King Arthur Baking’s guide to gluten-free ingredients.
Binding Agents: Understanding Their Role (Nut Butters, Dates)
Binding agents are essential for holding these gluten free dairy free protein bars together and contributing to their signature chewiness. Natural unsweetened nut butters (like almond, cashew, or peanut butter) are fantastic for this purpose. They provide healthy fats, protein, and a wonderful sticky texture. For a nut-free option, sunflower seed butter works beautifully. Dates, especially Medjool dates, are another powerhouse binder. When blended, their natural stickiness, coupled with their sweetness and fiber content, creates a perfect adhesive for the dry ingredients. They also lend a lovely caramel-like note to the bars.
Sweeteners: Natural Alternatives and Adjustments
We rely on natural sweeteners to keep these gluten free dairy free protein bars wholesome. Maple syrup and pitted Medjool dates are our go-to choices. Maple syrup adds a liquid sweetness that helps with moisture and binding, while dates provide bulk, fiber, and a rich, deep sweetness. You can adjust the amount of maple syrup based on your preference and the sweetness of your protein powder. Agave nectar can be substituted for maple syrup if preferred, but I find maple syrup offers a richer flavor profile.
Flavor Boosters: Nuts, Seeds, and Extracts
To elevate the flavor and texture of these protein bars, don’t shy away from flavor boosters! Chopped nuts (walnuts, pecans, almonds) or seeds (chia seeds, flax seeds, pumpkin seeds) add delightful crunch, healthy fats, and additional fiber. A splash of vanilla extract is almost always a good idea, as it enhances all the other flavors. For an extra treat, dairy-free chocolate chips or a sprinkle of shredded coconut can be folded in. Feel free to experiment with spices like cinnamon or a pinch of sea salt to balance the sweetness.
Baking Fats: Coconut Oil vs. Other Dairy-Free Options
Coconut oil is our preferred baking fat for these gluten free dairy free protein bars due to its neutral flavor (when refined) and its ability to firm up when chilled, which helps the bars hold their shape. It also contributes to a pleasant mouthfeel. Melted coconut oil integrates seamlessly into the wet ingredients. If you’re not a fan of coconut oil, a neutral-flavored oil like avocado oil or even melted dairy-free butter substitute can work, though they might alter the final texture slightly as they don’t solidify quite as much as coconut oil when cold.
Step-by-Step Instructions for Perfect Protein Bars
Follow these simple steps for perfectly delicious gluten-free dairy-free protein bars every time:
1. Prep Work: Gather and Measure Ingredients
Before you begin, line an 8×8 inch baking pan with parchment paper, leaving an overhang on the sides for easy removal later. Lightly grease the parchment to prevent sticking. Then, carefully measure all your ingredients. This ‘mise en place’ approach ensures a smooth baking process and prevents you from missing anything crucial. Make sure your nut butter is well-stirred and your dates are pitted and softened (if they aren’t already very soft, soak them in warm water for 10 minutes, then drain).
2. Mixing the Dry Ingredients
In a large mixing bowl, combine your chosen gluten-free dairy-free protein powder, gluten-free oat flour (or finely ground oats), and any optional dry flavor boosters like cinnamon or a pinch of salt. Whisk these dry ingredients together thoroughly with a fork or whisk until they are evenly distributed and there are no visible lumps of protein powder. This step is crucial for ensuring a uniform taste and texture throughout your bars.
3. Combining Wet and Dry Ingredients: Achieving the Right Consistency
In a separate, microwave-safe bowl, combine your wet ingredients: the nut butter, maple syrup, and melted coconut oil. Microwave briefly (about 30-60 seconds) until the mixture is warm and easily stirrable. Stir in your vanilla extract. If using dates, either blend them into a paste with a tablespoon of water in a food processor, or mash them very well and combine with the wet ingredients. Pour the wet mixture into the dry ingredients. Mix vigorously with a sturdy spoon or a rubber spatula. The mixture will be thick and sticky, eventually coming together into a dense, dough-like consistency. It should be firm enough to press, but not crumbly.
4. Pressing into the Pan: Even Distribution is Key
Transfer the entire mixture into your prepared 8×8 inch baking pan. Using the back of a spoon, your hands (lightly moistened to prevent sticking), or another piece of parchment paper, firmly and evenly press the mixture into the pan. Make sure it’s packed tightly into all corners and the surface is as level as possible. This uniform thickness is essential for even baking and easy cutting later. The firmer you press, the less likely your bars are to crumble.
5. Baking Times and Visual Cues for Doneness
Preheat your oven to 325°F (160°C). Bake the bars for 18-25 minutes. Baking times can vary slightly depending on your oven and the thickness of your bars. You’ll know they’re done when the edges look lightly golden and set, and the center feels firm to the touch when gently pressed. Avoid overbaking, as this can lead to dry bars. The bars will continue to firm up as they cool.
6. Cooling and Cutting: Patience for Best Results
This step requires patience! Once baked, remove the pan from the oven and let the bars cool completely in the pan on a wire rack. This is critical for them to set properly and prevent crumbling during cutting. Once completely cooled (which can take an hour or more), use the parchment paper overhang to lift the entire slab out onto a cutting board. Using a sharp, non-serrated knife, cut into your desired bar size. For best results, use a ruler to ensure even cuts. Clean the knife between cuts if it becomes too sticky.
Expert Tips for Success
- Preventing Crumbly Bars: Ingredient Ratios are Key: If your bars are crumbly, it’s usually due to too much dry ingredient (protein powder/oat flour) or not enough wet binder (nut butter/syrup/dates). Add an extra tablespoon of nut butter or maple syrup until the mixture holds together well when pressed.
- Achieving Even Thickness: Pressing Techniques: For uniformly baked and shaped bars, lightly dampen your hands or place another piece of parchment paper over the mixture and use a flat-bottomed glass or a rolling pin to press it down firmly and evenly into the pan.
- Flavor Variations: Customizing Your Bars: Don’t be afraid to experiment! Add a tablespoon of cocoa powder for chocolate bars, a teaspoon of orange zest for a citrusy twist, or swap out nut butters for different flavor profiles. A sprinkle of chopped candied ginger or dried cranberries can also be phenomenal.
- Troubleshooting Common Baking Issues: If bars are too sticky, try chilling them longer. If they still seem too soft, you might need a touch more dry ingredient next time. If they’re too hard, a little less baking time or more wet ingredients could be the answer. Always note what worked and what didn’t for future batches.
- For Enhanced Protein: Consider adding a tablespoon or two of defatted peanut flour or finely ground flax/chia seeds along with your protein powder for an additional protein and fiber boost without significantly altering the texture.
What to Serve With Your Protein Bars
Ideal Pairings for Breakfast
These gluten free dairy free protein bars are a fantastic stand-alone breakfast, but they also pair beautifully with other morning staples. Enjoy one with a warm cup of coffee or herbal tea, alongside a fresh fruit smoothie for an extra vitamin boost, or simply with a bowl of dairy-free yogurt and berries. They provide sustained energy to kickstart your day without a sugar crash.
Mid-Day Snack Enhancements
For a satisfying mid-day snack, these bars hit the spot. Pair them with an apple or a banana for added fiber and natural sugars, or a handful of your favorite mixed nuts for extra healthy fats. A glass of unsweetened almond milk can also complement the bars nicely, making for a truly wholesome and filling snack.
Post-Workout Replenishment
After a strenuous workout, your body craves protein and carbohydrates for recovery. These gluten free dairy free protein bars are ideal for post-workout replenishment. The combination of plant-based protein and natural sugars helps refuel glycogen stores and aid muscle repair. Enjoy one within 30-60 minutes after your workout, perhaps with a glass of water or an electrolyte drink, for optimal recovery.
Storing and Reheating Your Protein Bars
Room Temperature Storage Guidelines
For short-term storage (1-3 days), these gluten free dairy free protein bars can be kept in an airtight container at room temperature. Ensure they are in a cool, dry place away from direct sunlight. Stacking them with small pieces of parchment paper in between can help prevent them from sticking together, especially if your kitchen tends to be warmer.
Refrigeration for Extended Freshness
To extend their freshness and maintain their chewy texture, store the bars in an airtight container in the refrigerator for up to 1-2 weeks. Chilling them also makes them firmer and less prone to crumbling. This is often the preferred method, as the flavors tend to meld beautifully when cold.
Freezing for Long-Term Convenience
These protein bars freeze exceptionally well, making them perfect for long-term meal prep. Wrap individual bars tightly in plastic wrap, then place them in a freezer-safe bag or container for up to 2-3 months. To enjoy, simply pull one out and let it thaw at room temperature for about 30 minutes, or pop it in the microwave for a few seconds until just softened. This method ensures you always have a healthy snack on hand!
Frequently Asked Questions About Gluten-Free Dairy-Free Protein Bars
Can I Make These Bars Nut-Free?
What If My Bars Are Too Dry/Sticky?
How Can I Increase the Protein Content?
Are These Bars Suitable for Meal Prep?
Delicious Gluten Free Dairy Free Protein Bars Recipe
- Total Time: 35 minutes
- Yield: 12 bars
Description
Craft these wholesome and satisfying gluten-free dairy-free protein bars for a perfect on-the-go snack or meal replacement. They boast a deliciously chewy texture and a balanced, natural sweetness that you’ll adore.
Ingredients
- 1 cup gluten-free rolled oats, processed into flour (or oat flour)
- 1 cup gluten-free dairy-free protein powder (unflavored or vanilla pea/rice blend recommended)
- 1/2 teaspoon ground cinnamon (optional)
- 1/4 teaspoon sea salt
- 1/2 cup natural unsweetened nut butter (almond, cashew, or peanut butter; use sunflower seed butter for nut-free)
- 1/2 cup pitted Medjool dates, packed (about 8–10 dates, softened if dry)
- 1/4 cup maple syrup (or agave nectar)
- 2 tablespoons melted coconut oil
- 1 teaspoon vanilla extract
- 1/4 – 1/2 cup dairy-free chocolate chips or chopped nuts/seeds (optional, for flavor boost)
Instructions
- 1. Prepare Pan: Line an 8×8 inch baking pan with parchment paper, leaving an overhang. Lightly grease parchment.
- 2. Combine Dry Ingredients: In a large bowl, whisk together the oat flour, protein powder, cinnamon (if using), and sea salt until well combined.
- 3. Prepare Wet Ingredients: In a separate microwave-safe bowl, combine nut butter, dates, maple syrup, and melted coconut oil. Microwave for 30-60 seconds until warm and easily stirrable. Stir in vanilla extract. If dates are not soft enough, blend them into a paste with wet ingredients using a food processor.
- 4. Mix Wet and Dry: Pour the wet mixture into the dry ingredients. Mix vigorously with a sturdy spoon or spatula until a thick, uniform dough forms. If adding chocolate chips or nuts, fold them in now.
- 5. Press into Pan: Transfer the mixture to the prepared baking pan. Using a spoon or clean, slightly dampened hands, firmly and evenly press the mixture into the pan, ensuring it’s compact and level.
- 6. Bake: Preheat oven to 325°F (160°C). Bake for 18-25 minutes, or until edges are lightly golden and the center is set. Do not overbake.
- 7. Cool and Cut: Let the bars cool completely in the pan on a wire rack. Once fully cooled, use the parchment overhang to lift the slab onto a cutting board. Cut into 12 even bars with a sharp knife.
- 8. Store: Store in an airtight container at room temperature for up to 3 days, in the refrigerator for up to 2 weeks, or freeze for longer storage.
- Prep Time: 15 mins
- Cook Time: 20 mins